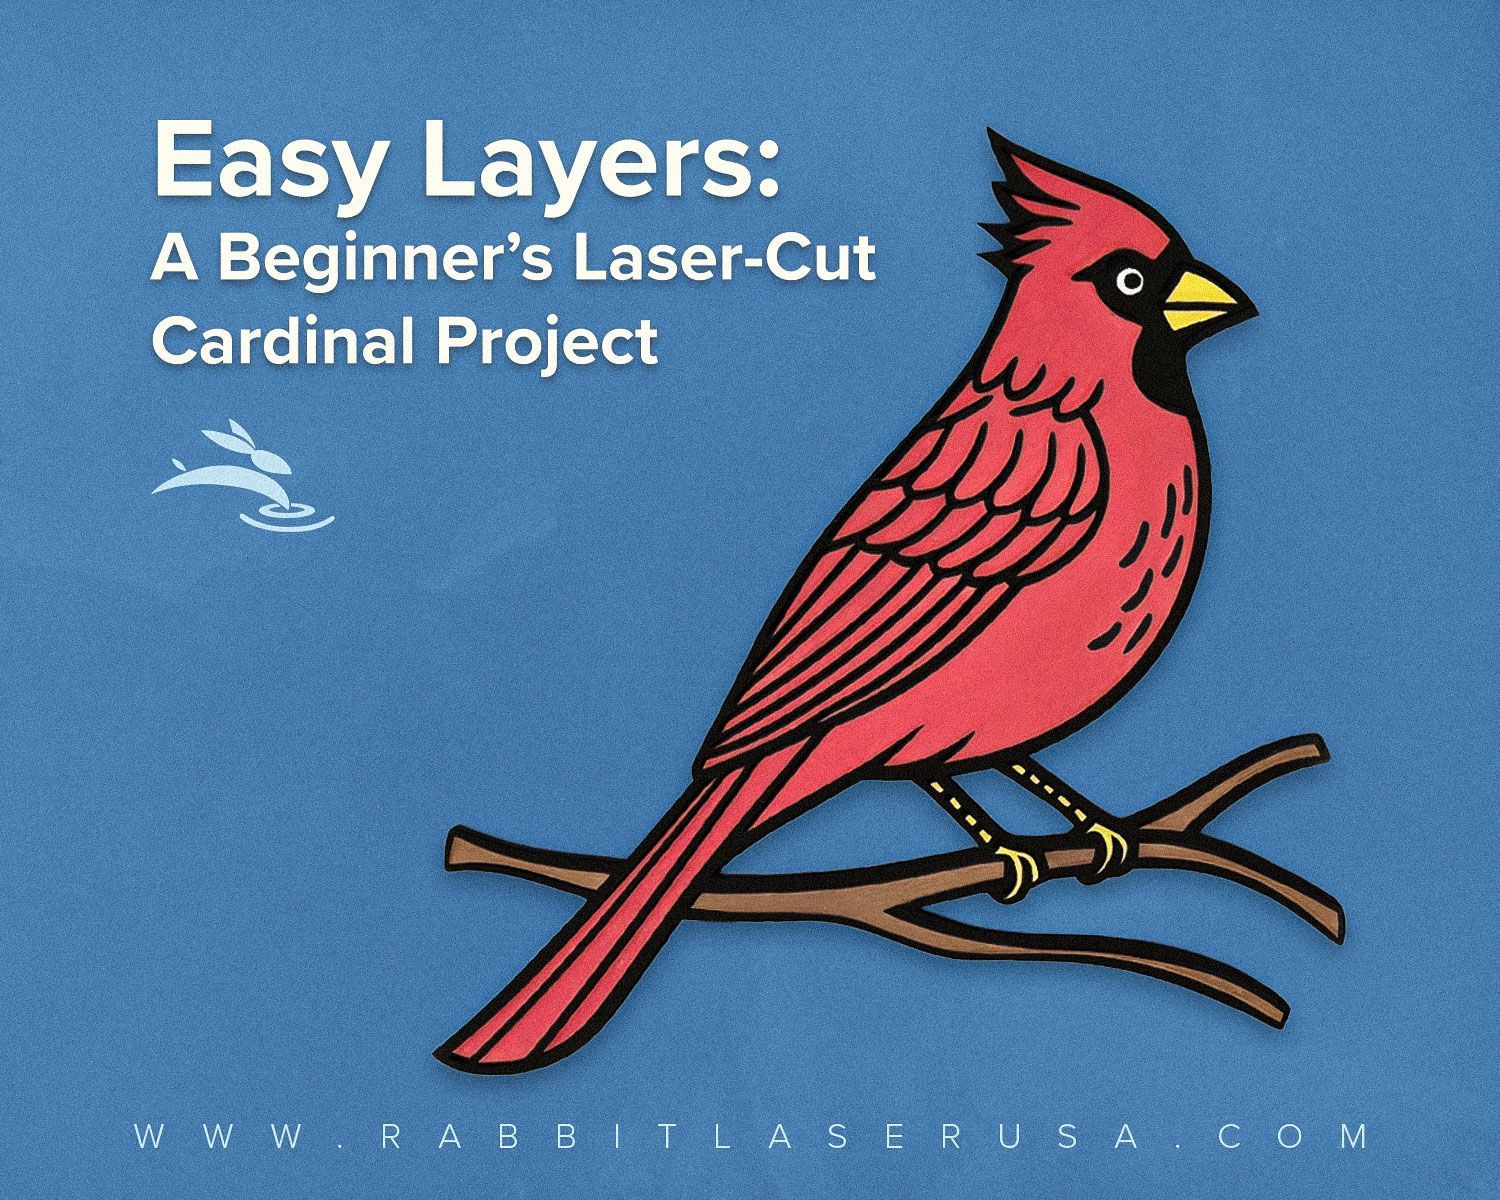
Unlock Laser Skills: Intro to RDWorks in Minutes!
Welcome to the world of precision and creativity at Rabbit Laser USA! If you're ready to delve deep into laser cutting and engraving, RDWorks is your quintessential partner. Our comprehensive guide will walk you through every step of using RDWorks for diverse projects, from simple cuts to complex engravings. Let's get started and transform your creative ideas into stunning realities. And remember, with Rabbit Laser USA, it's all about helping you Cut. Create. Conquer.
Crafting the Perfect Circle
Opening and Setting Up Your Project
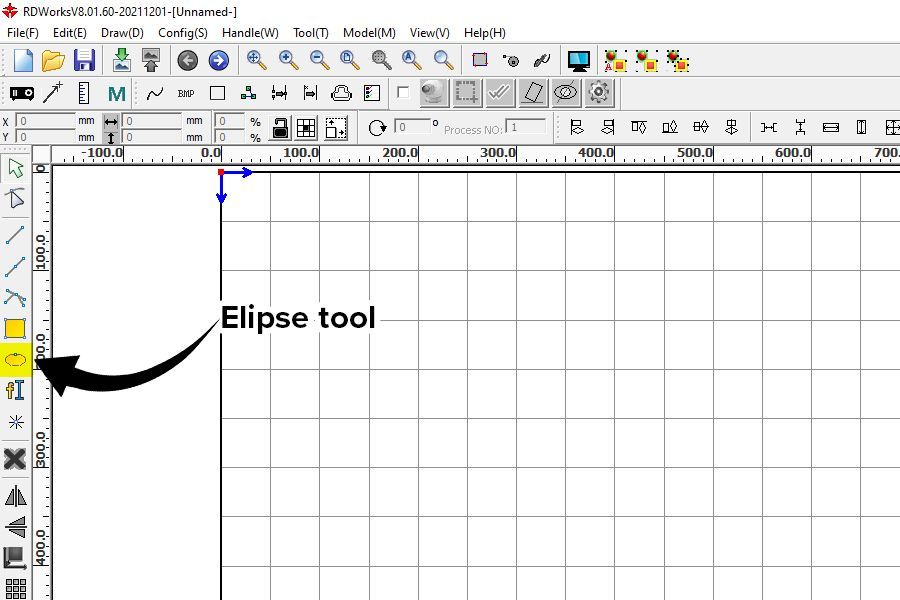
To begin, launch the RDWorks application and open a new project. Navigate to the toolbar and select the "Ellipse" tool for drawing circles. Click and drag in the work area to form your circle, adjusting its size using the dimension tools.
Adjusting Dimensions and Location
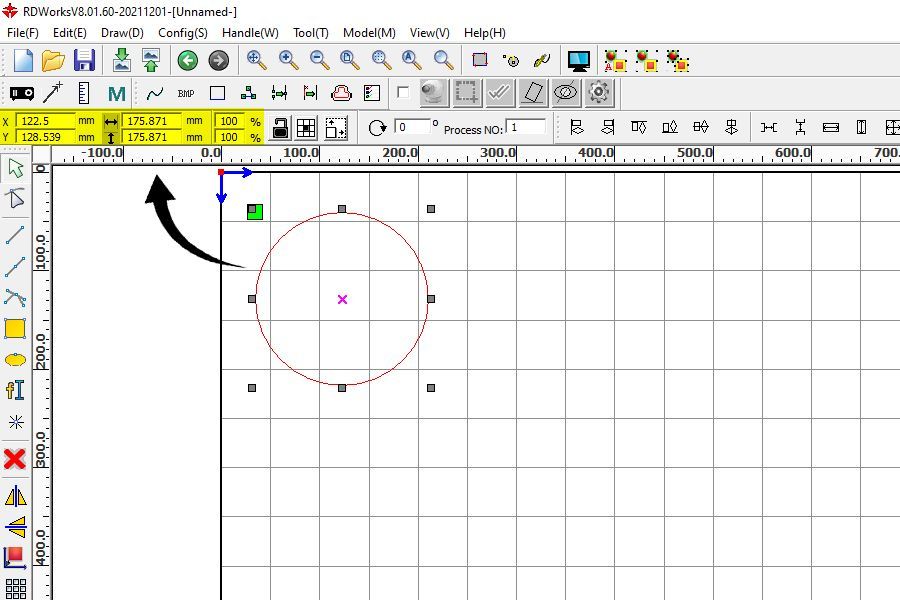
Once your circle is drawn, fine-tune its dimensions by entering specific values for the diameter in the dimension menu, ensuring precision down to the millimeter. Adjust the circle’s position on your work table by modifying the X and Y coordinates, aligning it perfectly with your material setup.
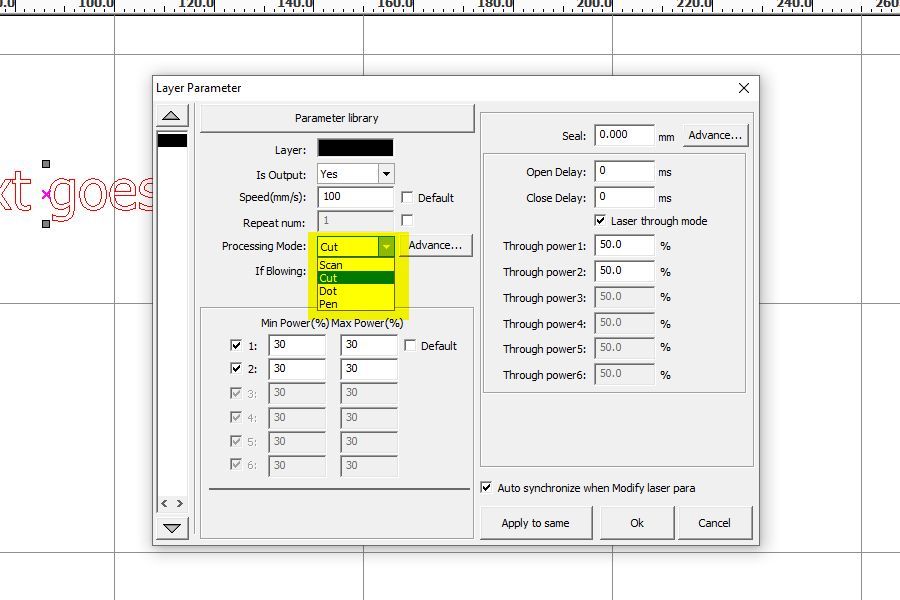
Setting Laser Parameters
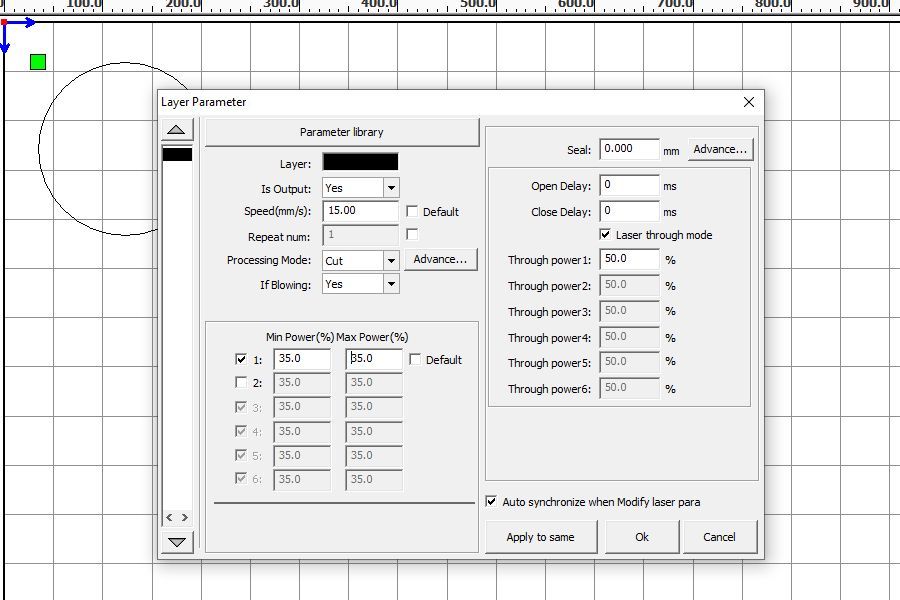
Change the layer settings to adjust the laser's speed and power, crucial for cutting different materials. Double-click the layer color to open the "Layer Parameter" window, and set your values based on the material you are using.
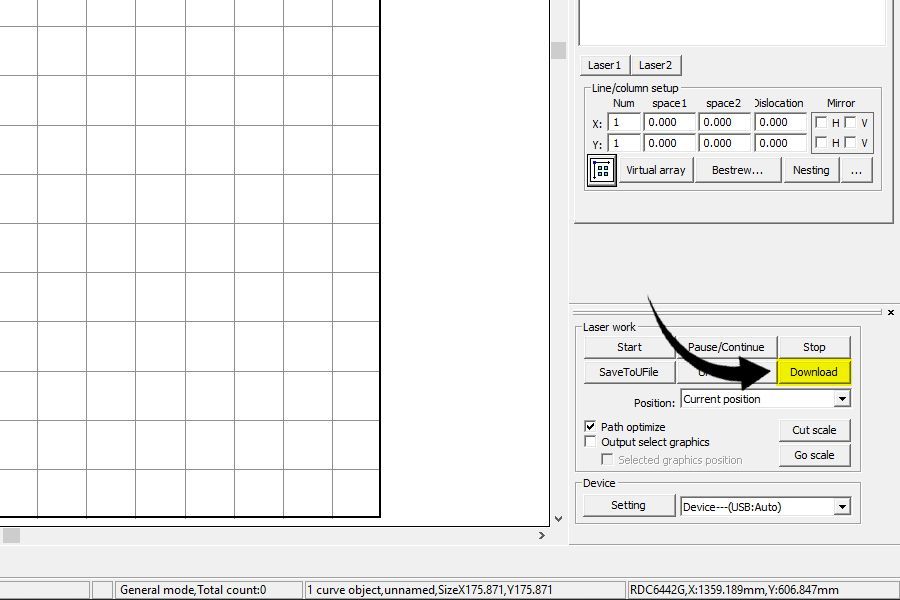
Saving and Transferring the Design
After adjusting your settings, save your project under a new name and prepare it for the laser machine. Connect your computer to the laser via USB, and use the "Download" button to transfer your design.
Engraving Text with Precision
Starting a New Text Project
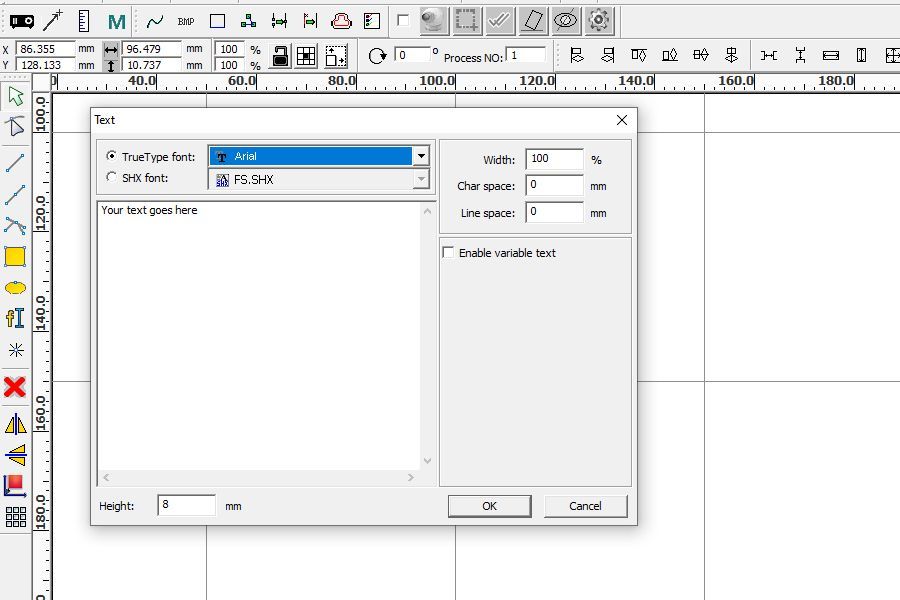
Open RDWorks and select the text tool from the toolbar. Click on your workspace where you want the text to begin, and an editing window will pop up.
Configuring Text Properties
Choose your desired font and adjust the text height and width to suit your project needs. RDWorks offers flexibility with character and line spacing adjustments, enabling detailed customization of your text layout.
Layer Adjustments for Engraving
Ensure the layer is set to "Scan" mode to switch from cutting to engraving. This is crucial for proper text engraving. Modify the speed and power settings in the "Layer Parameter" window to optimize the laser for the material you’re engraving.
Completing and Downloading Your Text Project
Once your text is styled and set, save the project and download it to the laser machine, ready for engraving. This will ensure your settings are perfectly matched to the material and the design intent.
Importing and Modifying Bitmaps for Engraving
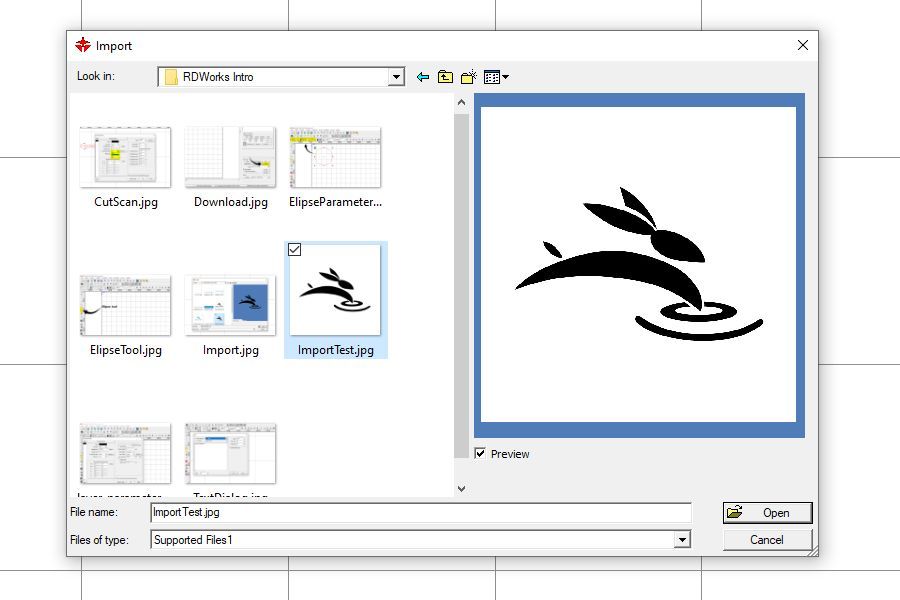
Importing Your Image
Start by importing a bitmap image into RDWorks using the "Import" function under the file menu. RDWorks supports a variety of file formats, ensuring broad compatibility.
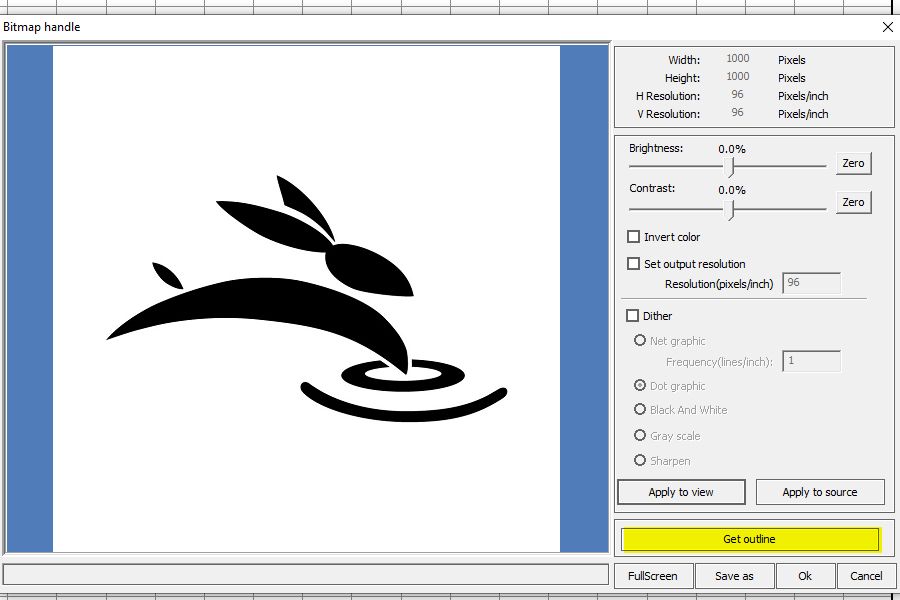
Adjusting Image Settings
Use the "Bitmap Handle" tool to adjust brightness, contrast, and other image properties to optimize it for engraving. This tool is essential for converting colored images to grayscale or black and white, suitable for the laser to interpret.

Setting Up Layers for Cutting and Engraving
After modifying your image, apply the changes and set up different layers for cutting and engraving. Adjust each layer’s parameters such as speed, power, and cutting mode to match the material and the design complexity.
Saving and Executing Your Bitmap Project
Save your adjusted image as a new RDWorks file and download it to your laser cutter. Make sure all settings align with the material specifications and that your machine is properly calibrated for the project.
Final Thoughts
Whether you’re crafting simple shapes, engraving personalized text, or transforming detailed images into engravable art, RDWorks provides the tools and flexibility needed to execute your projects with precision. At Rabbit Laser USA, we're committed to supporting your creative journey as you Cut. Create. Conquer.
For more detailed guidance and support, visit our website or reach out to our expert team. Let's create something incredible together!