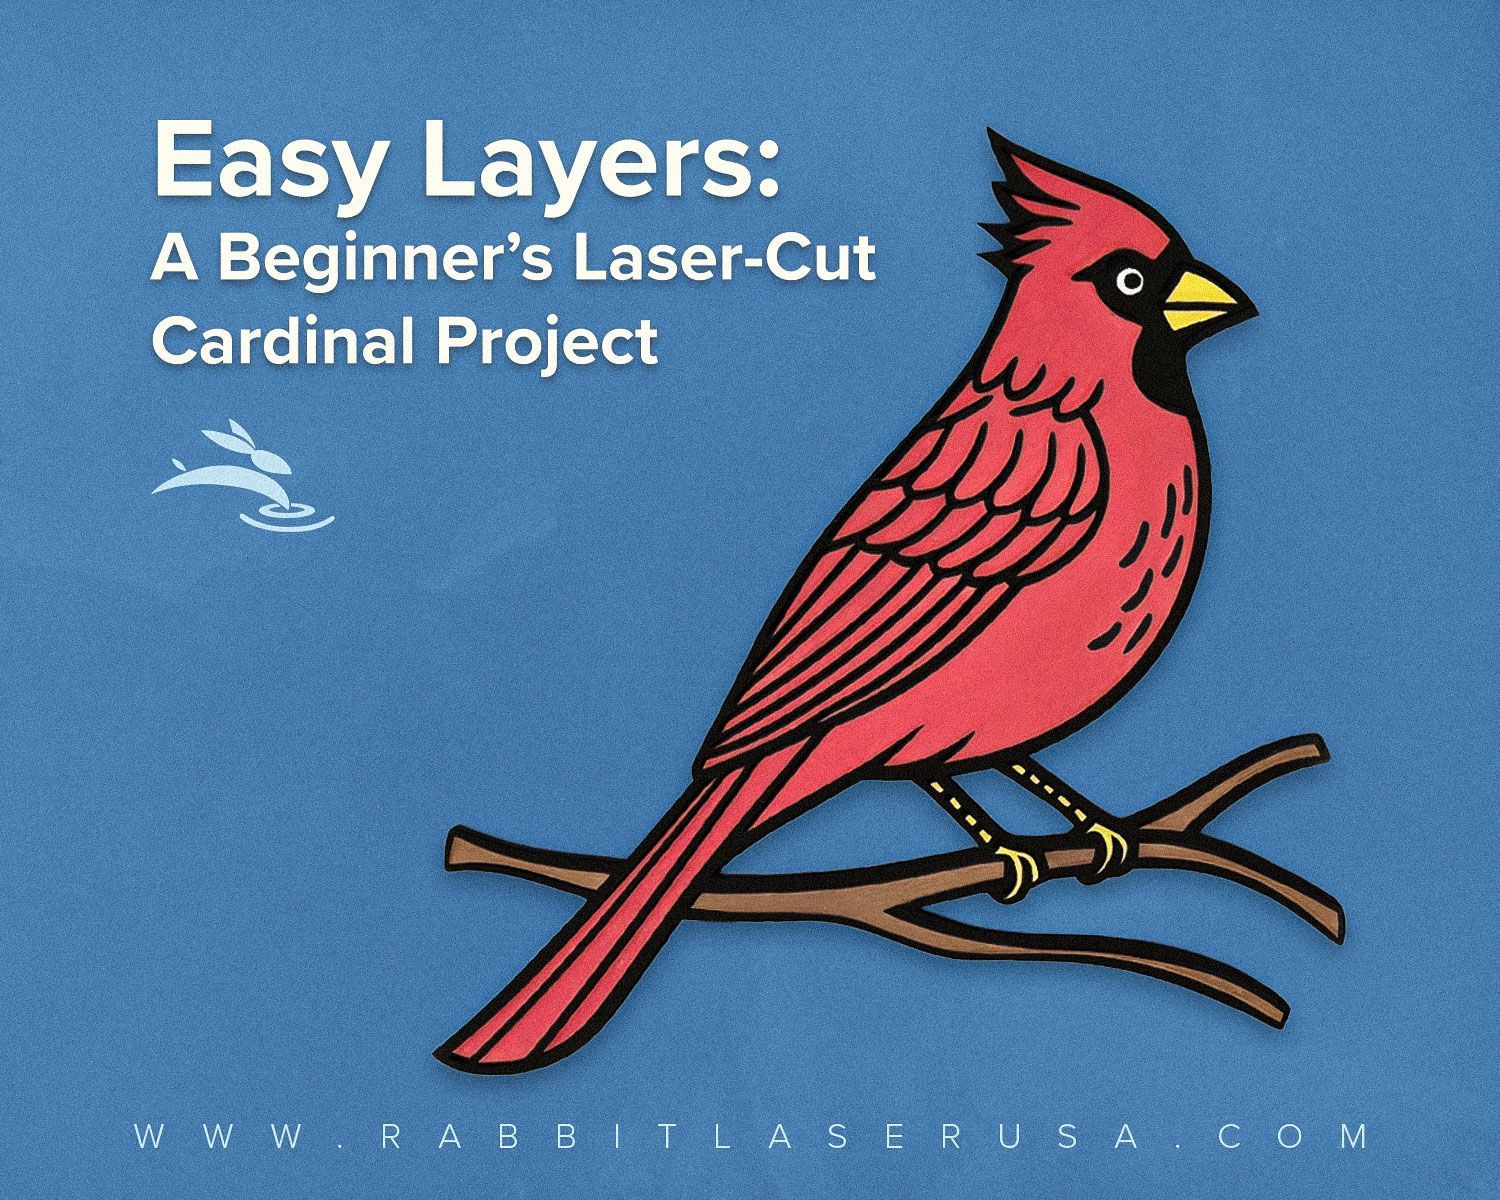
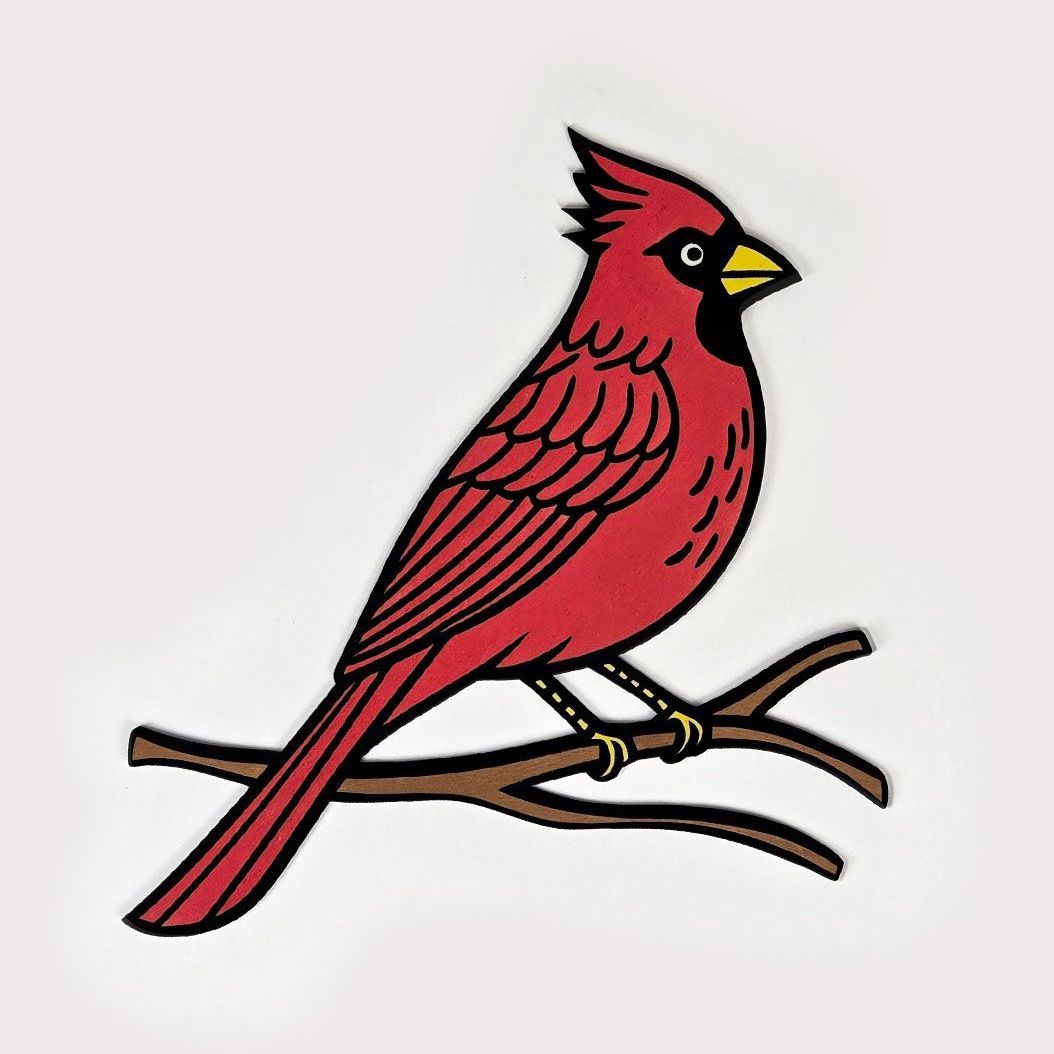
Easy Layers: A Beginner’s Laser-Cut Cardinal Project
We're excited to show you how to create a layered cardinal on a branch that’s bursting with color! We’ll use our DL-40-6040 CO2 laser (40W) and some everyday craft supplies to bring this design to life.
Materials You’ll Need
1. DL-40-6040 CO2 Laser (40W)
- If you have a different laser, just adjust your settings accordingly.
2. 3mm Birch Plywood
- Easy to cut and great for painting.
3. Cardinal Vector by Fuad Creations
- Link: Cardinal Line Drawing Vectors (free for commercial use)
- Feel free to use any other bird design if you prefer—just make sure you have the rights to do so!
4. LightBurn Software & Downloadable File
- Download our color-separated LightBurn file here
- This file is already set up with the layers you need (red, black, white, yellow, brown).
5. Cardboard (for an alignment jig)
- Any old box or sheet will do—just make sure it’s larger than your cardinal outline.
6. Apple Barrel Matte Acrylic Paints
- Nutmeg Brown (branch)
- Bright Yellow (beak + legs)
- Flag Red (cardinal body)
- Black (Backer/Outline)
- White (eye)
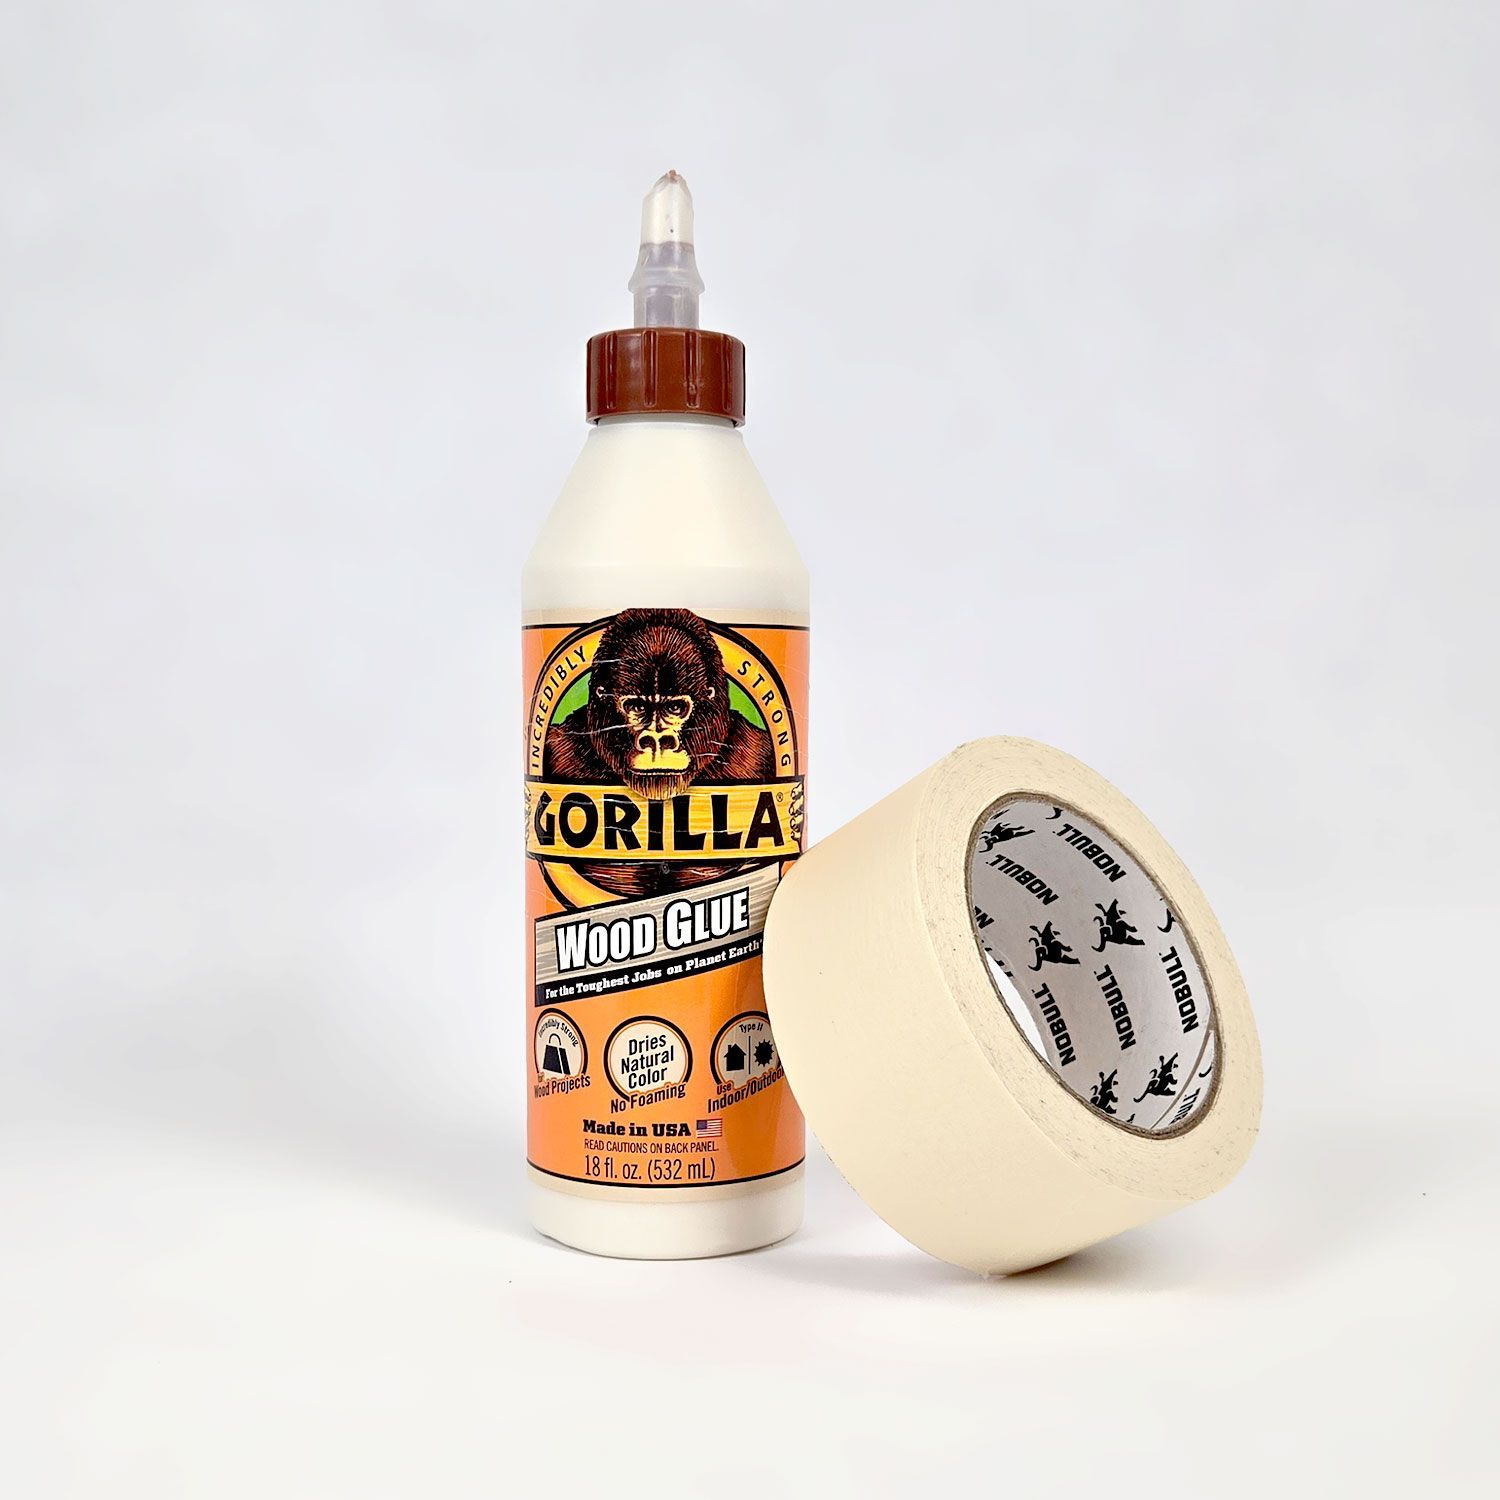
7. Wood Glue
- A little goes a long way.
8. Hook and Loop Fasteners
- Perfect for hanging your finished piece without using nails or screws.
9. Hand-Held Spring Clamps + Scrap Wood
- For uniform pressure while the glue sets.
10. Painter’s Tape
- We’ll use the sticky side up trick to keep small pieces in place while painting.


Step 1: Setting Up in LightBurn
- Download the original Cardinal Vector from Fuad Creations.
- Import the design into LightBurn.
- Alternatively, open our color-separated LightBurn file here (right-click "save link as...") to skip the hassle of organizing layers.
- Check layer assignments so you know which part of the design will be cut in each color.
Why separate layers?
It helps you keep track of each part of the design (branch, feathers, beak, etc.) for painting and assembly.
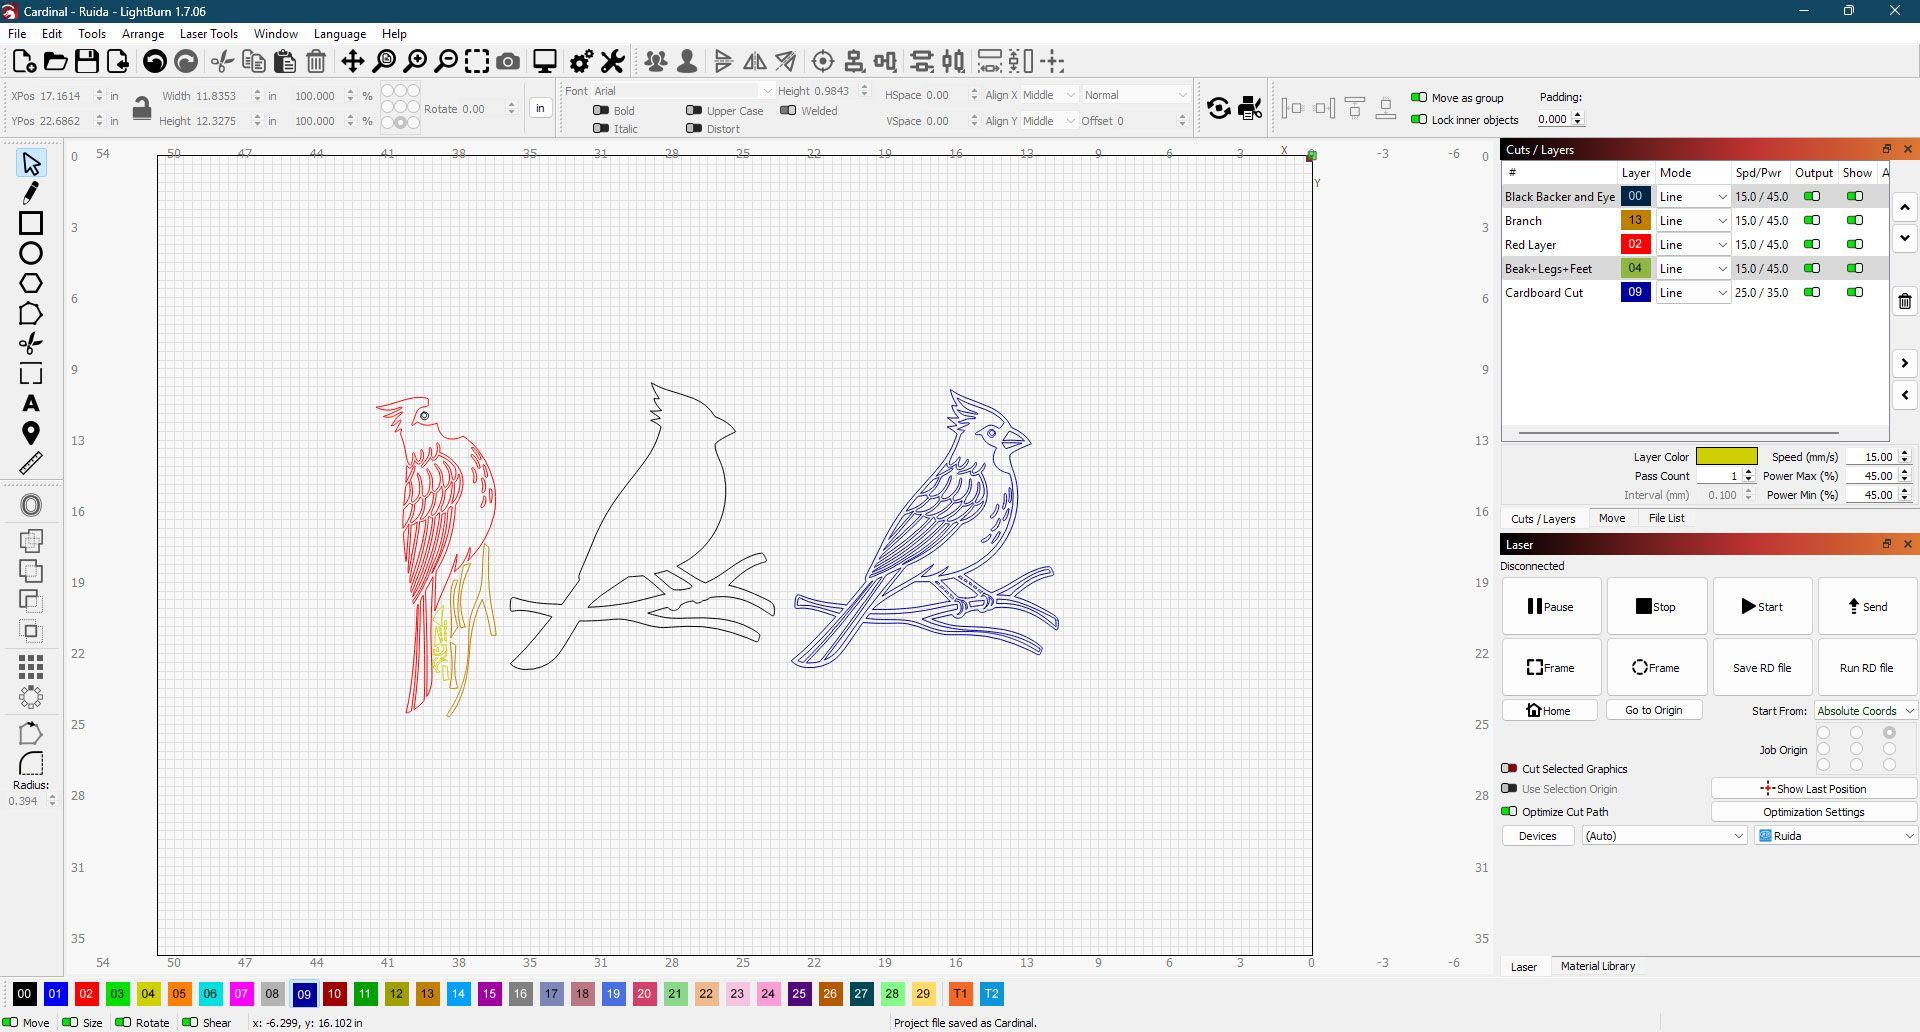
Step 2: Laser Cutting on the DL-40-6040
For 3mm birch plywood on a 40W CO2 laser, our suggested settings are:
- Power: 45%
- Speed: 15 mm/s
- Air Assist: ON
- Passes: 1
Tips for Best Results
- Check focus before cutting; a crisp beam gives cleaner edges.
- Secure your plywood to prevent shifting.
- Test on scrap wood first—every laser and material can differ slightly.
If cuts don’t go through: Slow the speed or bump the power a bit.
If you see charring: Try faster speeds or lower power.
Step 3: Make a Cardboard Jig
A cardboard jig ensures everything lines up perfectly when gluing:
- Trace or laser-cut the cardinal outline onto cardboard.
- Leave a little extra space so you can tape down the jig if needed.
- Test-fit your wood pieces to ensure they nest snugly.
No Jig, Big Problem
Without a jig, layers can slip around—and nobody wants a crooked bird!
Step 4: Painting with Apple Barrel Acrylics
This is where your cardinal gets its color:
- Sort your pieces by color (branch, cardinal body, beak, markings).
- Use painter’s tape sticky side up for small parts. Just tape the ends to your work surface, then stick the pieces in place.
- Paint lighter colors first (Bright Yellow, White). Once dry, move on to Flag Red, Black, and Nutmeg Brown.
- Let each layer dry for about 20–30 minutes. Apple Barrel Matte paint dries quickly, but you can add another coat if needed.
- Detail Areas: A small brush or a toothpick helps with fine details like the beak and eye.
Pro Tip
Keep a damp cloth nearby for quick cleanup if you accidentally paint outside the lines.


Step 5: Assembling Your Layers
Bring your cardinal to life:
- Place the cardboard jig on a flat surface.
- Position each painted layer inside the jig. Make sure everything lines up exactly the way you want.
- Apply wood glue: A thin, even layer is ideal—too much can seep out and cause a mess.
- Clamp it: Use a small scrap of wood on top of the project and then secure it with hand-held spring clamps. This applies uniform pressure over the entire piece.
- Drying: Follow the glue’s directions (usually 30–60 minutes for a firm hold).
Gotta Keep It Clean
Wipe away any glue overflow with a damp cloth before it dries.
Step 6: Finishing Touches
- Sealer (Optional): If you want extra protection or a glossy finish, spray on a clear coat once everything’s fully dry.
- Hook and Loop Fasteners: Attach one side to the back of your cardinal and the other to the wall, then just stick it up—super easy!
- Alternative Displays:
- Prop it on a small easel.
- Drill a hole for an ornament hanger.
- Mount it in a shadow box for a pro gallery look.
Final Thoughts
- Congrats! You’ve created a bright, layered cardinal that’s sure to impress.
- Explore & Experiment: Try adding sparkly paint accents or a wintery background for a holiday feel.
- Share Your Masterpiece: If you post it online, tag us so we can cheer on your creativity!
- We’d like to thank Fuad Creations for providing the original artwork (link above).
- Don’t Forget: Download our layer-separated LightBurn file for a head start on organizing your layers.
Happy Crafting!