Enhance Your Designs with LightBurn’s Offset Tool
Have you ever tried adding a simple outline around a word or shape, only to end up with a messy design that just doesn’t look right? I’ve been there, too. It’s like trying to put a puzzle piece in the wrong spot—frustrating and time-consuming. That’s exactly why I’m so excited about the Offset Tool in LightBurn. It’s a simple yet powerful feature that can make your designs jump off the screen and onto your material in a way that looks professional and polished.
Why the Offset Tool Matters
The Offset Tool creates a copy of your shape or text at a set distance away, almost like drawing a border around it. If you’ve ever outlined a letter to make it stand out or added a “shadow” to give depth to a design, you were basically doing an offset by hand. LightBurn just makes this process faster, easier, and way more accurate.
Common Uses of the Offset Tool
- Outlines Around Letters or Logos
If you want your text to really pop on a plaque or sign, an offset creates that bold outline. - Layered Designs
Offset lets you stack multiple shapes of slightly different sizes to give a 3D effect. - Protecting Delicate Cuts
Adding a small offset around thin sections of a design can reduce the chance of breakage when you cut or engrave.
Step-by-Step Guide to Using the Offset Tool
- Select Your Design
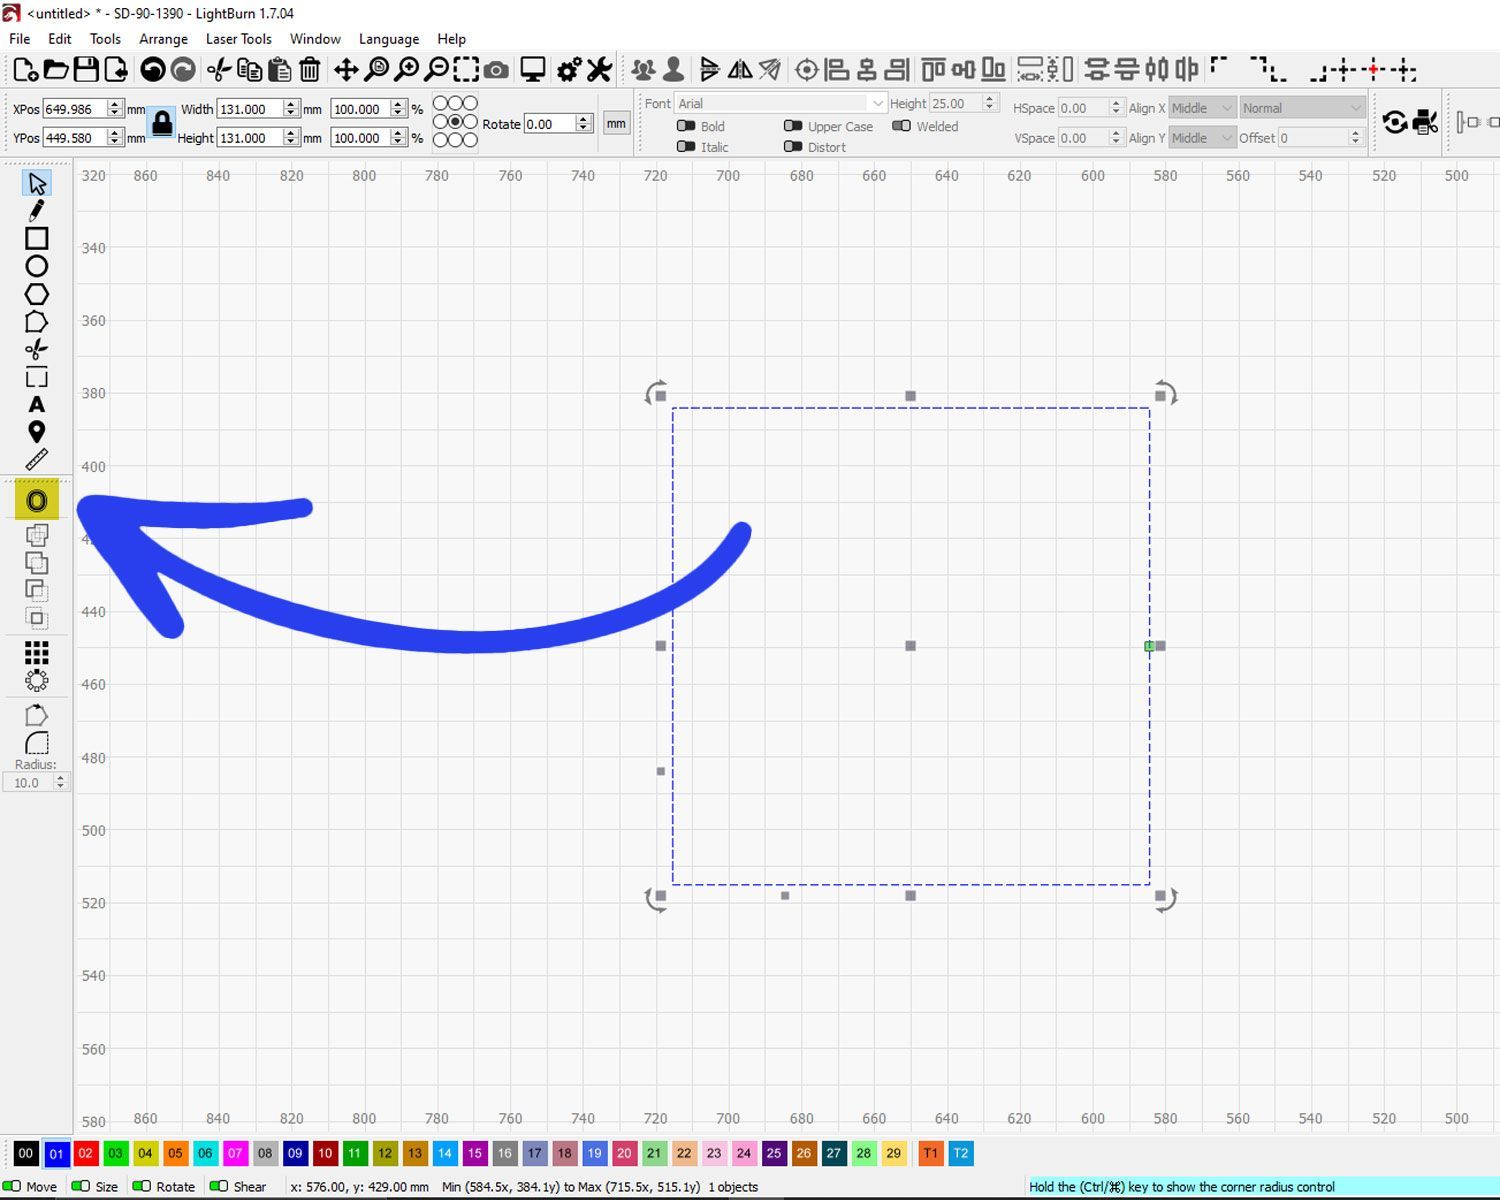
Open LightBurn and pick the shape, text, or logo you want to work with. For starters, try something simple like a circle or a word. - Find the Offset Option
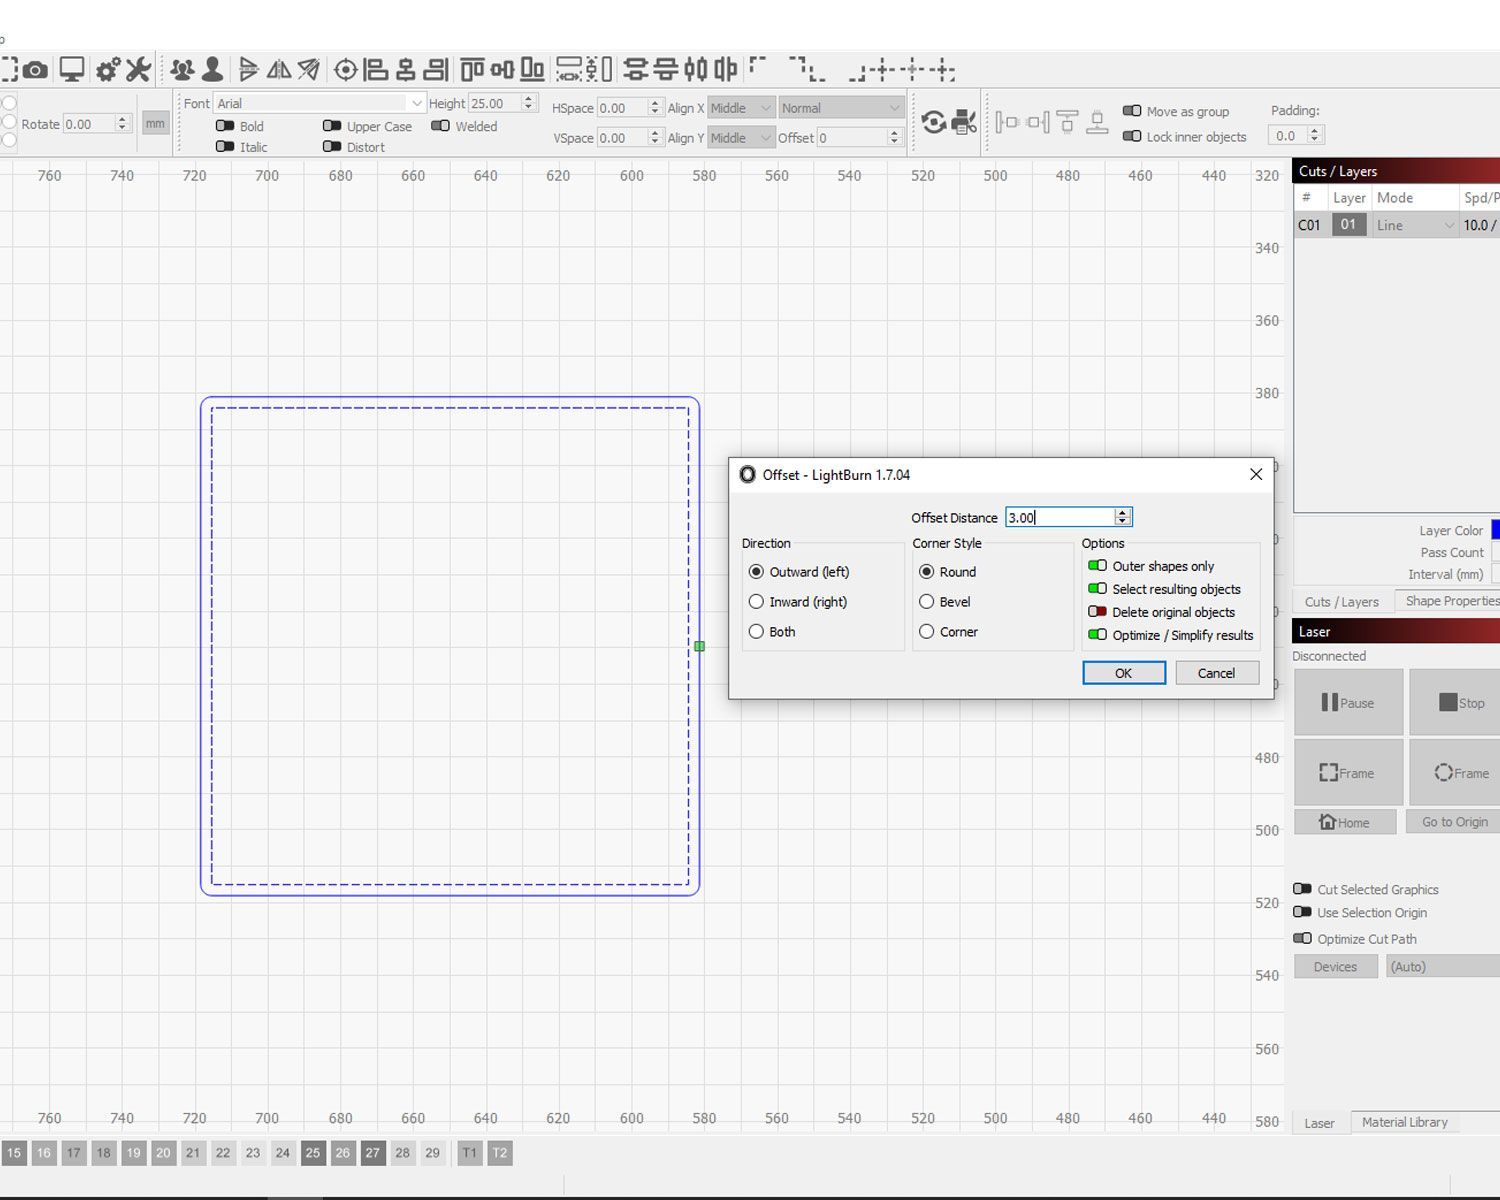
Locate the “Offset” or “Offset Shapes” button (usually found in the main toolbar). Click it to open up the Offset settings window. - Set Your Distance
Here’s where you decide how far away you want the border from your original shape. You might start small—something like 2mm—just to see how it looks. If it’s too big or too small, don’t worry, you can change it. - Corners and Direction
LightBurn lets you choose if corners are sharp or rounded. If your design has curvy lines, rounded corners can look more natural. You can also decide whether the offset is on the outside or the inside of your original shape. - Preview and Adjust
Always preview before you settle on your final settings. You can tweak the distance or corner style until it feels perfect. - Apply and Save
Once you’re happy with the preview, hit “OK” (or “Apply”). Then save your file. Trust me, you don’t want to lose your work because you forgot to click “Save”!
Real-Life Examples
Personalized Signs for Events
- Think of a wedding sign that says “Welcome” in elegant script. By adding a small offset, you get a neat border that brings more attention to the text.
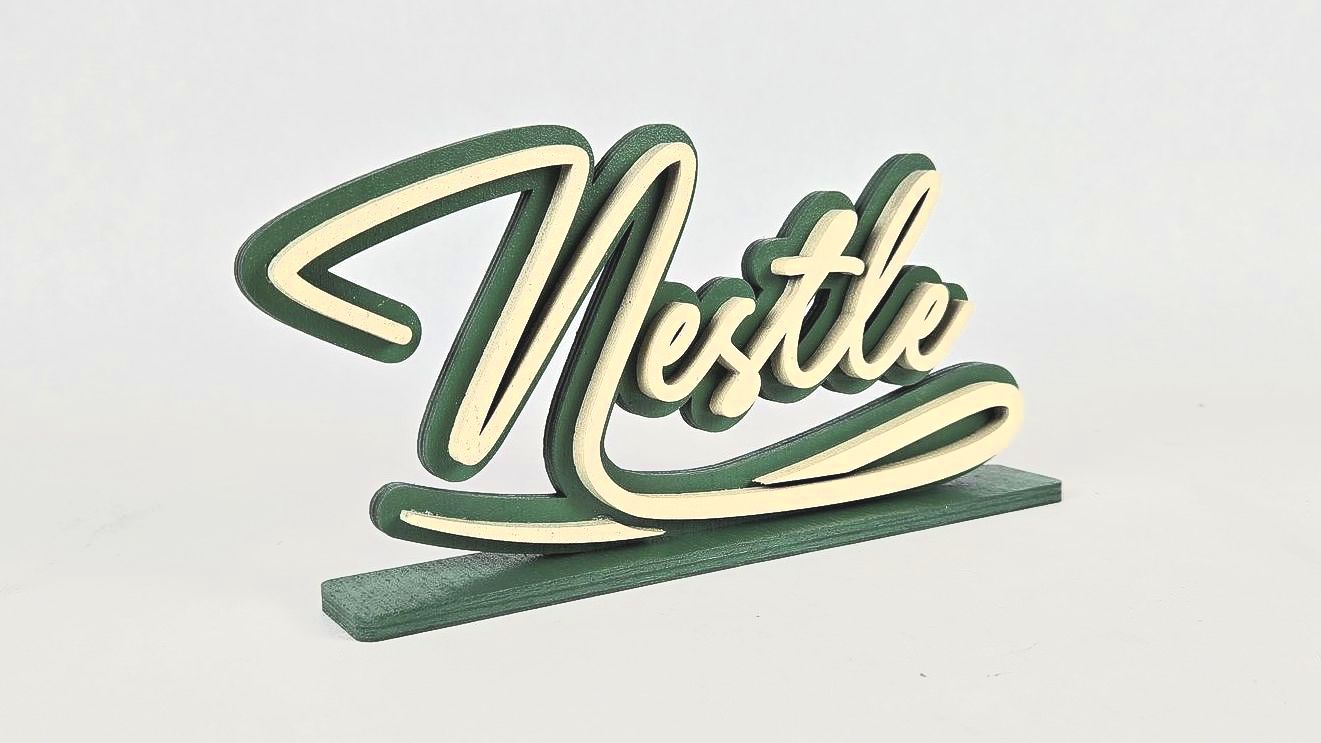
Small Business Branding
- Want your logo to stand out on a storefront sign? Offset the logo layers to give it a multi-dimensional look. Customers will notice the crisp outlines and professional finish.
Gifts with a Special Touch
- Imagine you’re making a wooden nameplate for a friend. Adding an offset around each letter can give it that extra “wow” factor. It shows you’ve paid attention to the details.
Mistakes to Avoid
Over-Offsetting
I once tried to offset a detailed floral pattern by a large distance. Instead of a pretty border, I ended up with a shape that looked like a blob. Smaller offsets can often look neater.
Ignoring Corner Types
Sometimes you need smooth, rounded corners (think hearts and swirls). Other times, you want the corners to stay sharp (think geometric shapes). Picking the wrong style can change the look of your entire design.
Forgetting to Save
Yes, I’m mentioning this again. It’s such a bummer when you craft the perfect offset, then lose it because you forgot to save. Make it a habit to save often!
Why Great Tools Matter
Using the Offset Tool effectively is just one piece of the puzzle. To bring your designs to life, you need a reliable, high-quality laser machine. That’s where we come in. Our laser engraving and cutting machines feature top-notch components that give you the precision you need. Imagine cutting out an offset outline around a delicate flower design and having the lines come out crisp every single time. It’s that kind of accuracy that helps your projects look professional.
Ready to Elevate Your Design Game?
If you’re excited about using the Offset Tool and want to see how your creations can shine on different materials, it might be time to invest in a laser system that offers both power and reliability. We sell lasers built to handle the delicate details your projects demand. Whether you’re a hobbyist experimenting in your garage or a seasoned professional expanding your business, we have a laser that fits your needs.
- Need an upgrade? We’ve got that covered, too. Our team is happy to help you explore options and find the perfect machine for your workflow.
- Looking for tips and technical support? We provide lifetime customer support, so you’ll never be stuck figuring things out on your own.
Action Steps
- Open LightBurn: Pick a simple shape or text, then try an offset using a small distance—maybe 2–3mm.
- Experiment with Corners: Switch between round and sharp corners to see which you prefer.
- Save Regularly: Keep a backup copy of your original file.
- Share Your Results: Show friends or family the difference an offset makes. It’s always fun to get feedback.
By starting small, you’ll quickly learn what settings work best for your style. And remember, your creations deserve a quality laser to bring them to life!
So go on, give the Offset Tool a try. Have fun exploring new design possibilities—and when you’re ready to step up your game, take a look at our powerful and precise laser machines. Happy offsetting! 🐰