
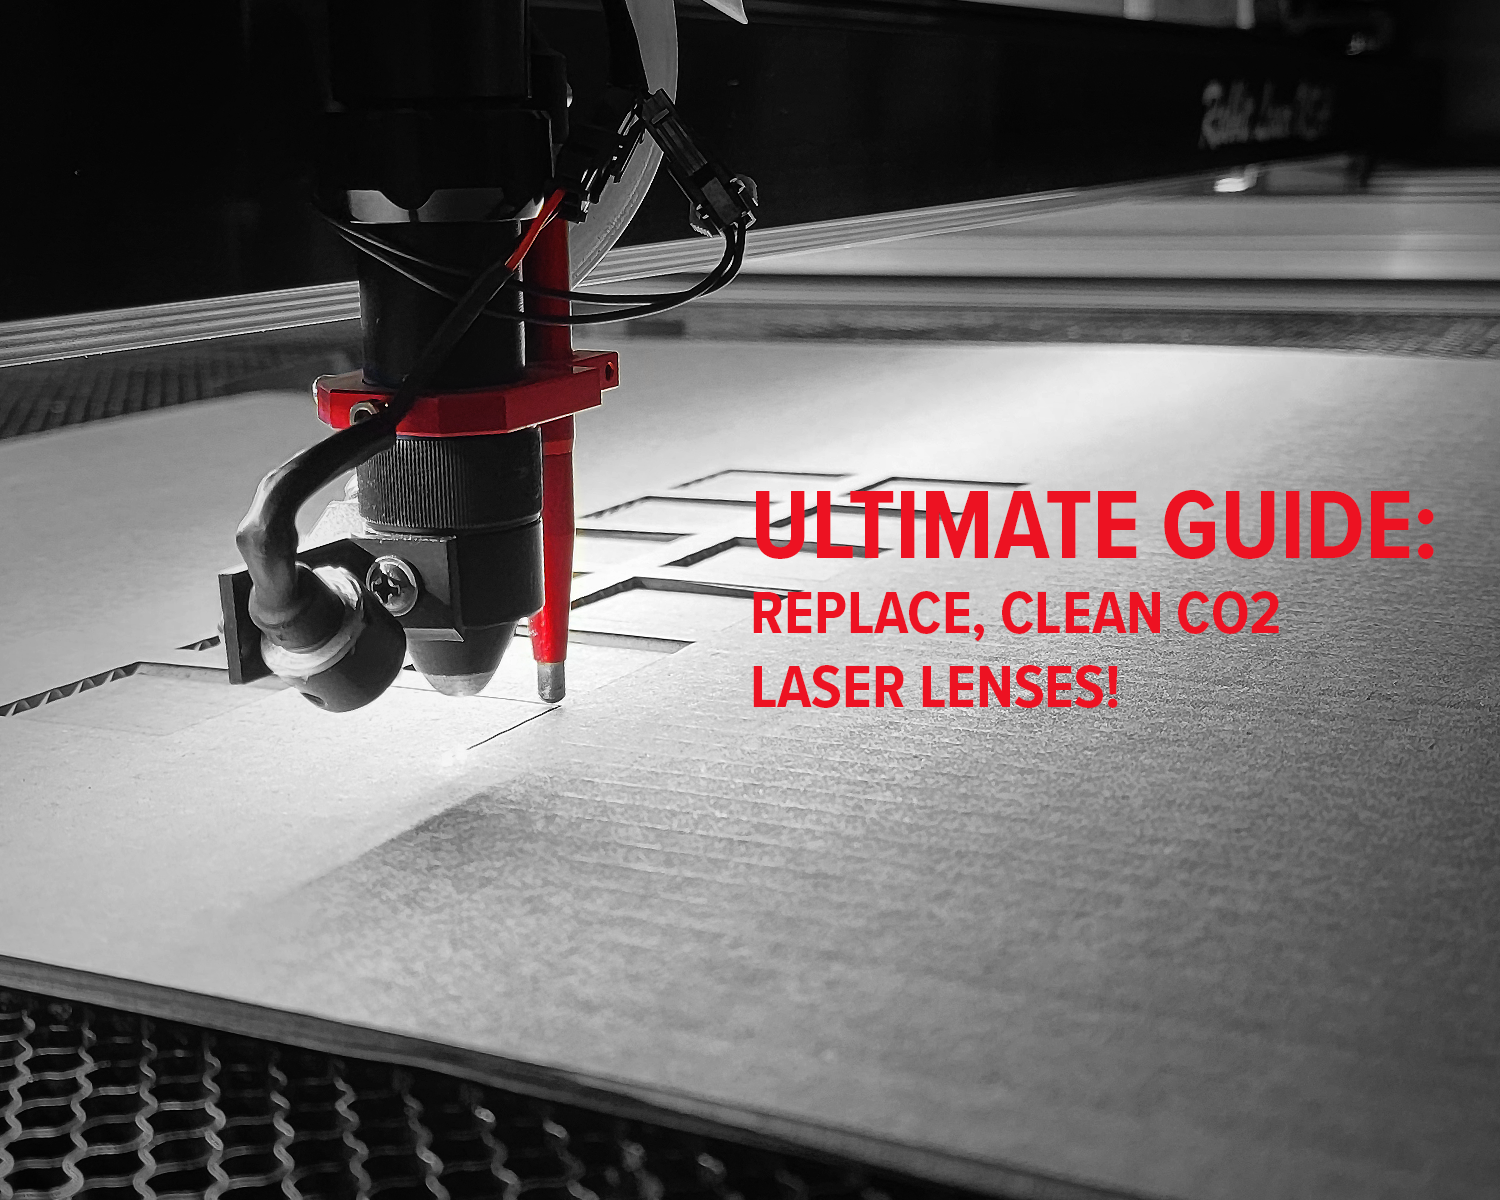
The first step is to disconnect the wires connected to the autofocus and the Red Dot pointer. These are typically the initial components you'll need to address when accessing the lens.
Ultimate Guide: Replace, Clean CO2 Laser Lenses!
Introduction
Are you finding that your CO2 laser machine isn't performing as it should? It might be time to give your lens some attention. In this guide, we'll take you through the process of removing and cleaning your laser lens step by step to ensure it's working optimally. Video with narration at the bottom of this blog.
Disconnecting Components
Loosening the Lens Housing

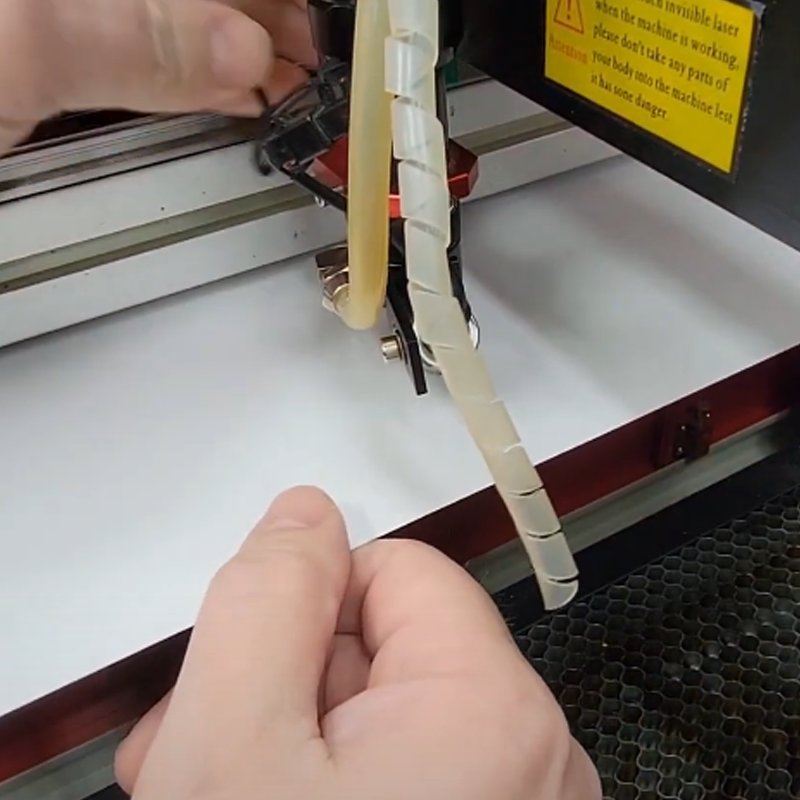
Next, it's time to loosen the air hose to allow you to pull out the lens housing easily. By loosening the collar, you'll find it much simpler to slide out the lens housing.
Removing Autofocus and Lens Housing
Once the housing is free, remove the collar and use an allen wrench to loosen the set screws for the autofocus. This ensures that you can safely remove the lens without causing any damage.
Unscrewing the Lens Housing
Now it's time to unscrew the lens housing from the nozzle head. You might need a specific removal tool to help with this. Once the retainer nut is out, simply turn the housing over to remove the lens.
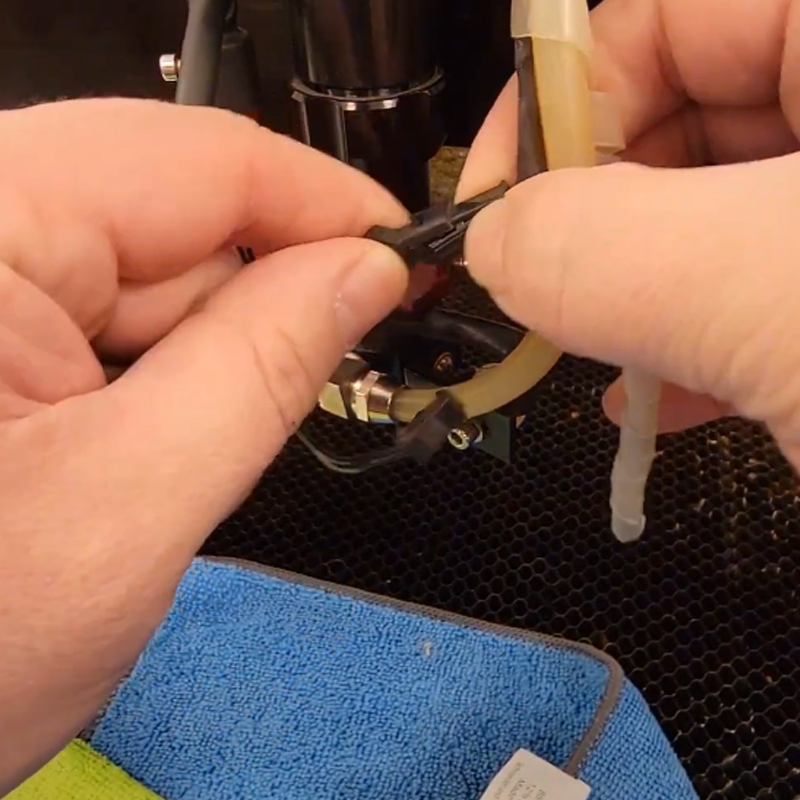
Cleaning the Lens
Before proceeding further, it's crucial to clean the lens thoroughly using rubbing alcohol and a microfiber cloth. Make sure no oils or residues are transferred from your fingers to the lens during this process.
Reassembling the Lens
When reinserting the lens, ensure it's correctly oriented with the convex side facing towards the laser Source. Once it's in place, tighten the retaining nut securely.
Final Steps
After securing the lens, reattach the nozzle head, autofocus, and collar. Ensure everything is tightened securely but not excessively. Reconnect the wires and tighten the air hose back onto the nipple.
Adjusting Autofocus
Now, it's time to fine-tune the autofocus. Use a piece of cardstock or paper to set it to just barely touch the surface. This adjustment is crucial for setting up the laser machines with the autofocus offset.
Testing and Conclusion
With everything back in place, it's time for a test run. Perform a test cut to ensure everything is functioning correctly. A clean cut indicates that the lens replacement or cleaning was successful.
Maintaining Your Laser Machine Lens
Regular maintenance and cleaning of your CO2 laser machine lens are essential for optimal performance. By following these steps, you can ensure that your laser cutter operates efficiently for all your cutting needs. 🐰
Watch video with narration below.

Use our cost ranges, power math, and depreciation guide to price laser-engraved tumblers for healthy profit. Includes free worksheet download.

Learn how Rabbit Laser USA combines 3D printing and laser cutting to improve precision, boost efficiency, and innovate custom fabrication solutions.

Discover the art of crafting beautiful wood inlays with precision laser cutting in our step-by-step guide. Learn essential tips for preparing and testing materials like Baltic birch plywood and cherry wood veneer, ensuring flawless results in your projects. This tutorial covers everything from selecting the right wood and masking techniques to detailed engraving and cutting processes. Perfect for DIY enthusiasts and crafters looking to enhance their skills with laser technology!

Learn how to master job origins in LightBurn with this essential guide. Discover when to use Absolute Coordinates, User Origin, and Current Position to improve precision, efficiency, and material usage in your laser cutting and engraving projects. Plus, get quick tips to streamline your workflow and avoid common mistakes.

Discover why RuiDa controllers are the industry standard for laser engraving and laser cutting machines. Learn how they outperform proprietary controllers, offer seamless LightBurn compatibility, and provide unmatched precision. At Rabbit Laser USA, we’ve been upgrading customers' machines with RuiDa to give them full control over their laser cutter and engraver. Upgrade your laser machine today!
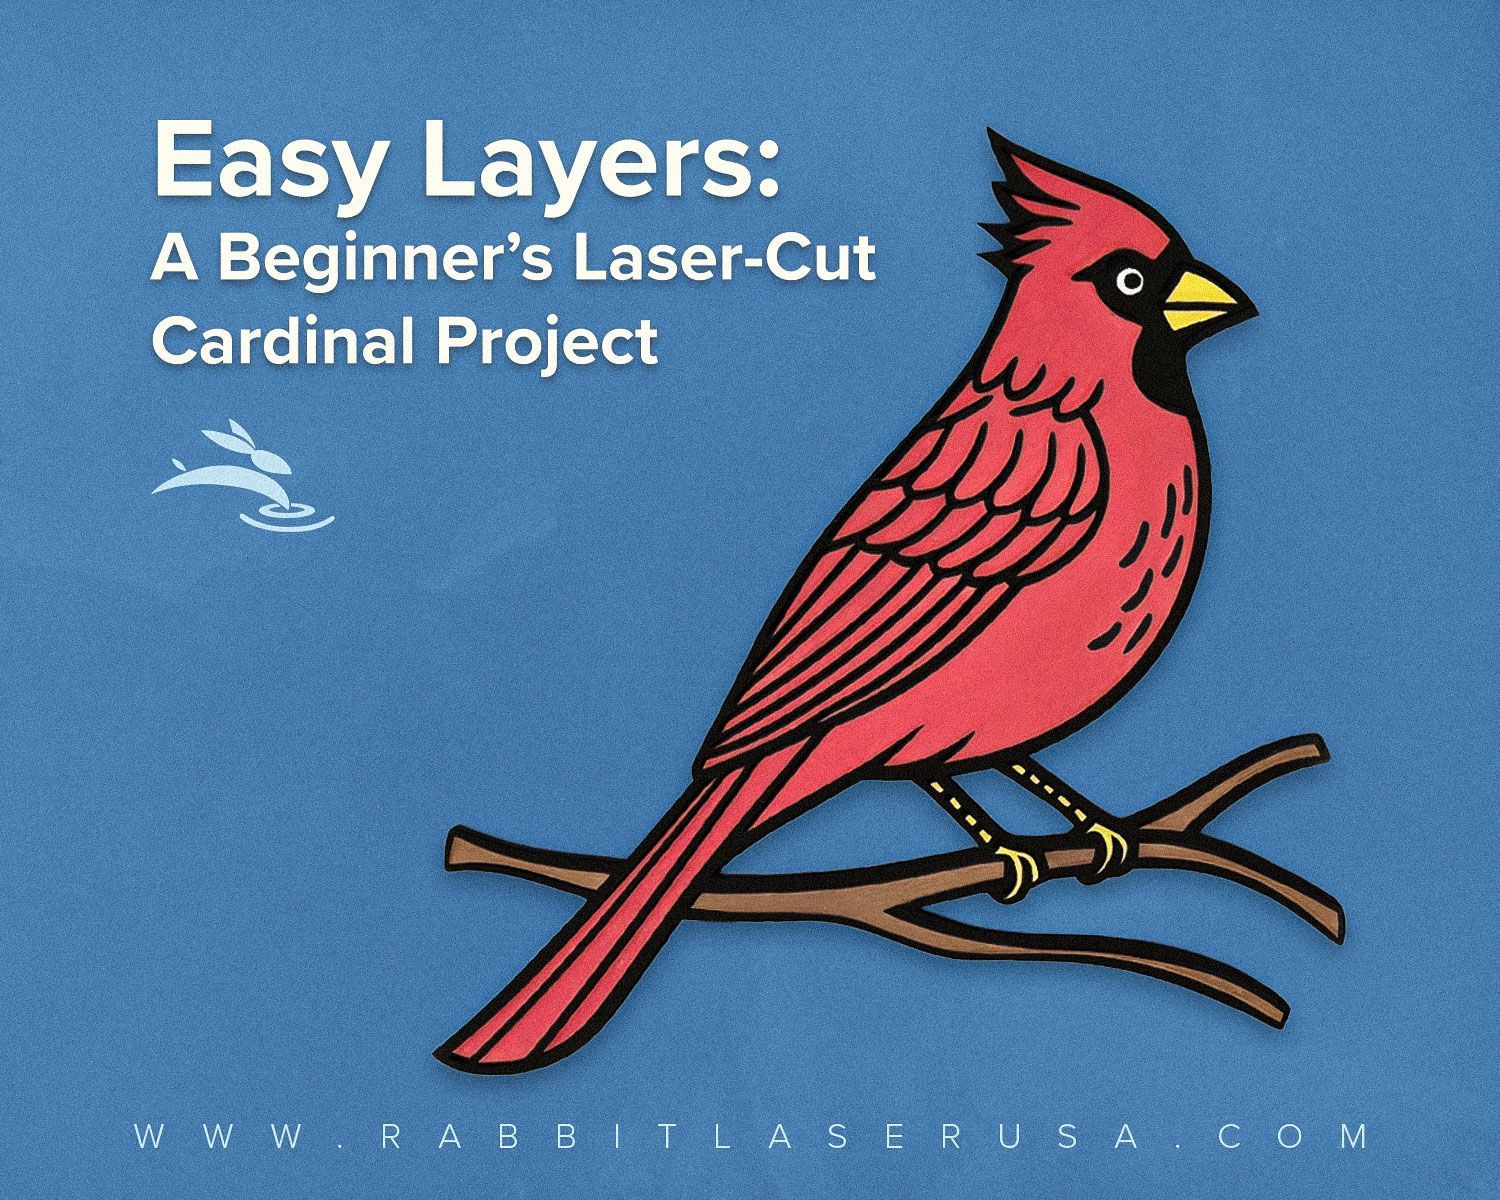
Create a vibrant, layered cardinal with this beginner-friendly laser cutting guide. Learn color separation, painting tips, and assembly tricks for eye-catching décor.
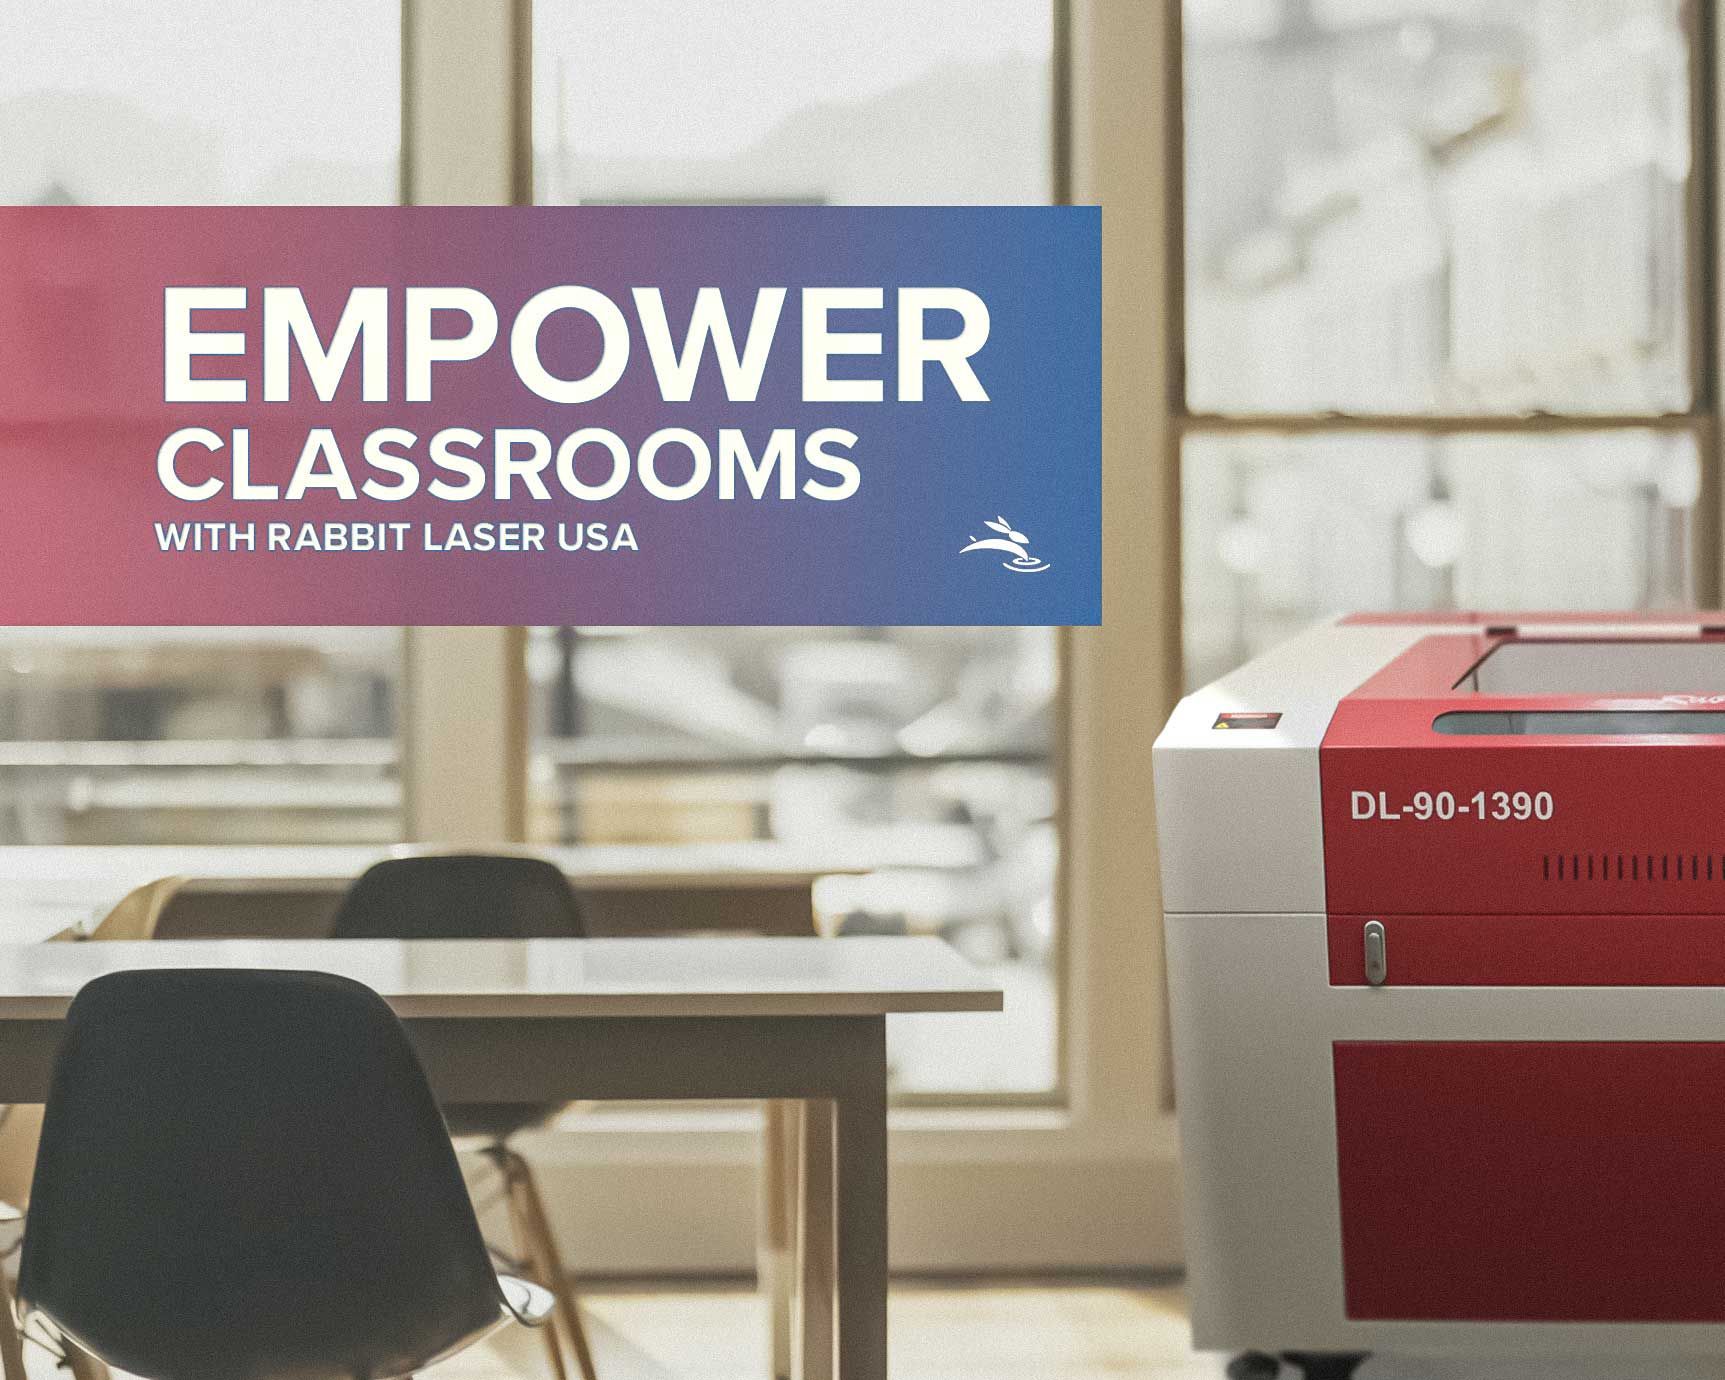
Empower your classroom with Rabbit Laser USA’s reliable laser systems—minimize downtime, save with educator discounts, and spark student creativity!

Discover the importance of selecting the right focal length for your CO2 laser machine with Rabbit Laser USA. Learn about different lenses, their optimal uses, and maintenance tips to enhance your laser engraving and cutting projects. Ensure precision and safety with our guide to lens choices and care.
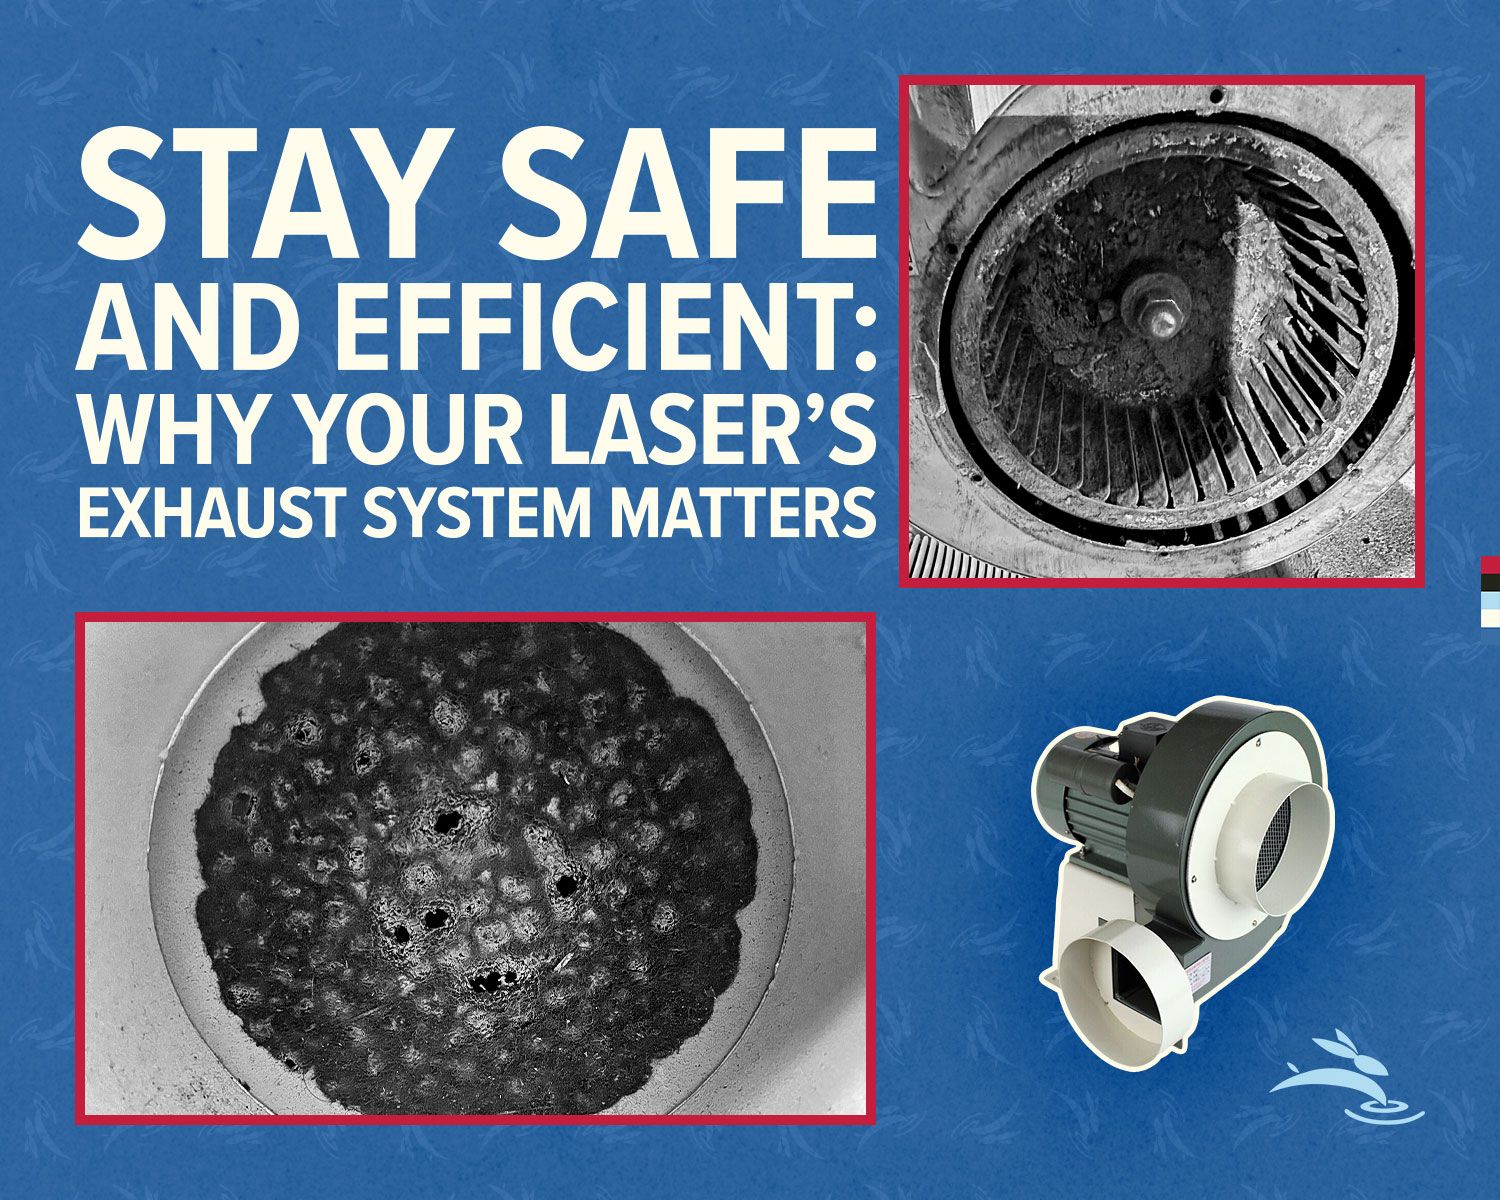
Learn why maintaining your laser’s exhaust system is crucial for safety, health, and top performance. Get monthly maintenance tips, discover which materials are toxic, and see how Rabbit Laser USA’s 550W Vacuum Blower Fan can keep your workspace safe and efficient.
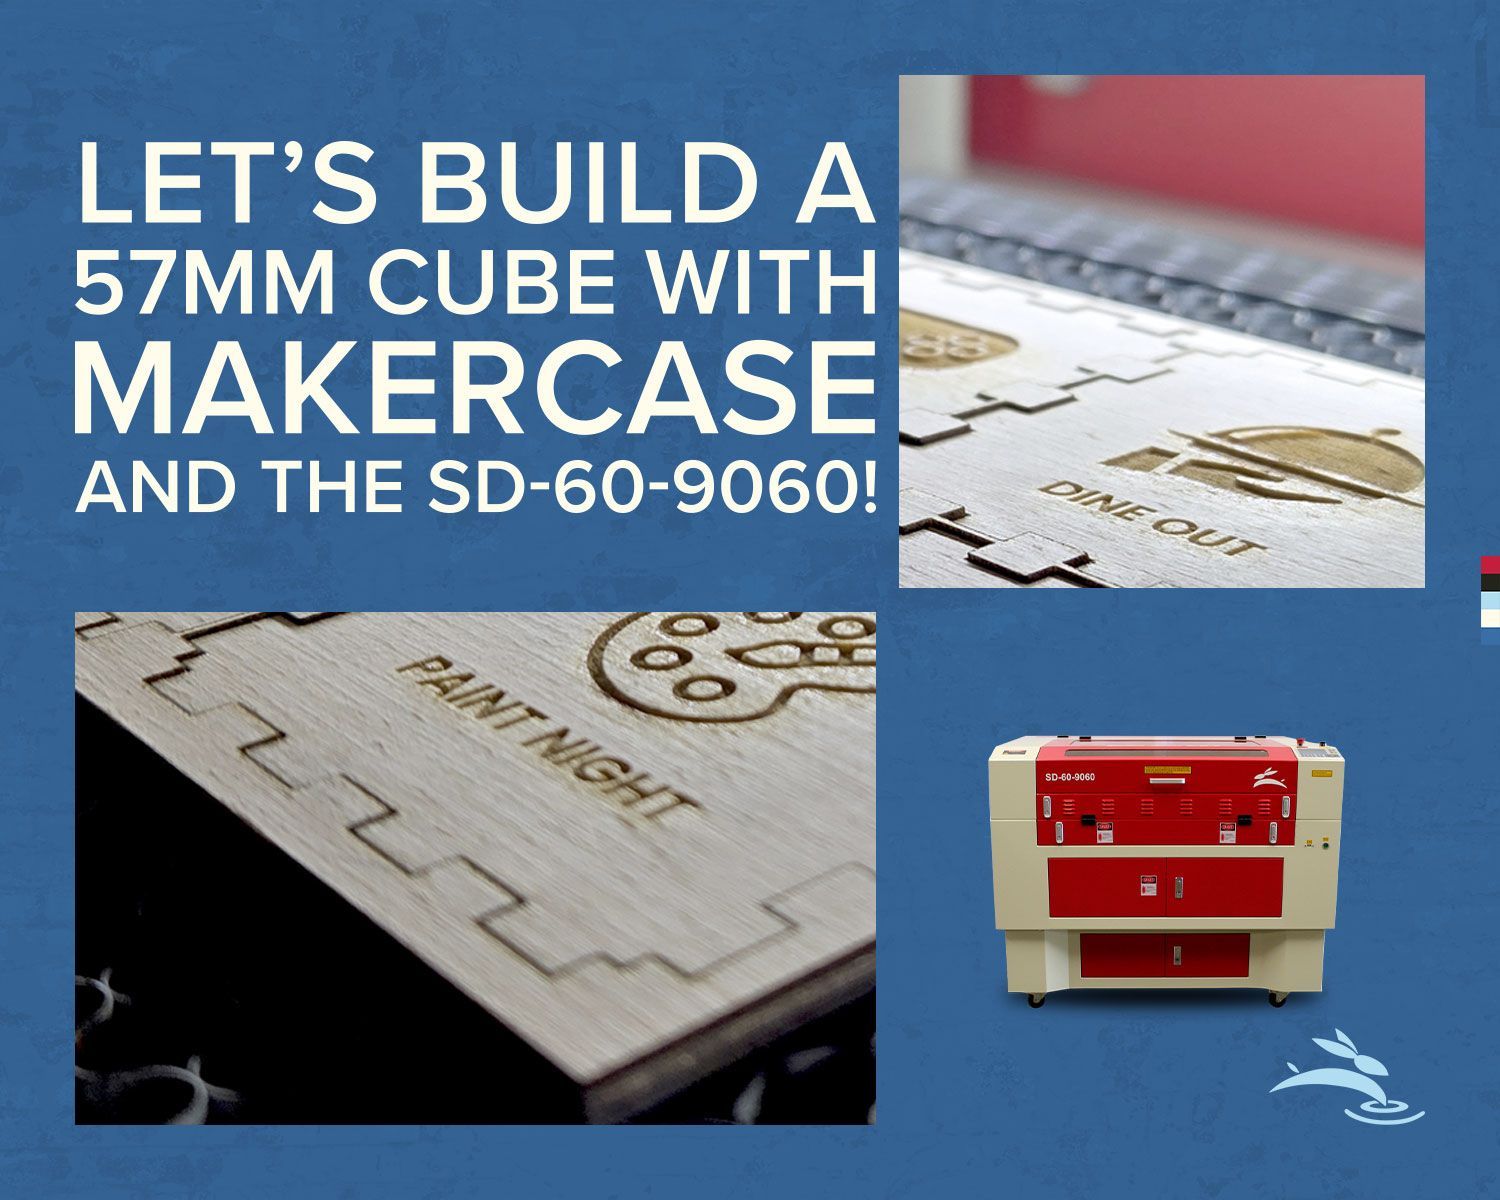
Learn how to design and create a 57mm cube using MakerCase and Rabbit Laser USA's SD-60-9060 CO2 laser cutter. Follow our step-by-step guide featuring precision settings, cutting tips, and assembly techniques for a perfect fit. Perfect for makers, hobbyists, and educational projects!
Minimize downtime with Rabbit Laser USA's in-stock laser machine parts and fast shipping. From lenses to air assist components, we ensure reliable quality and quick delivery. Count on our lifetime customer support to keep your laser engraving and cutting machines running smoothly. Visit us today to stay productive!
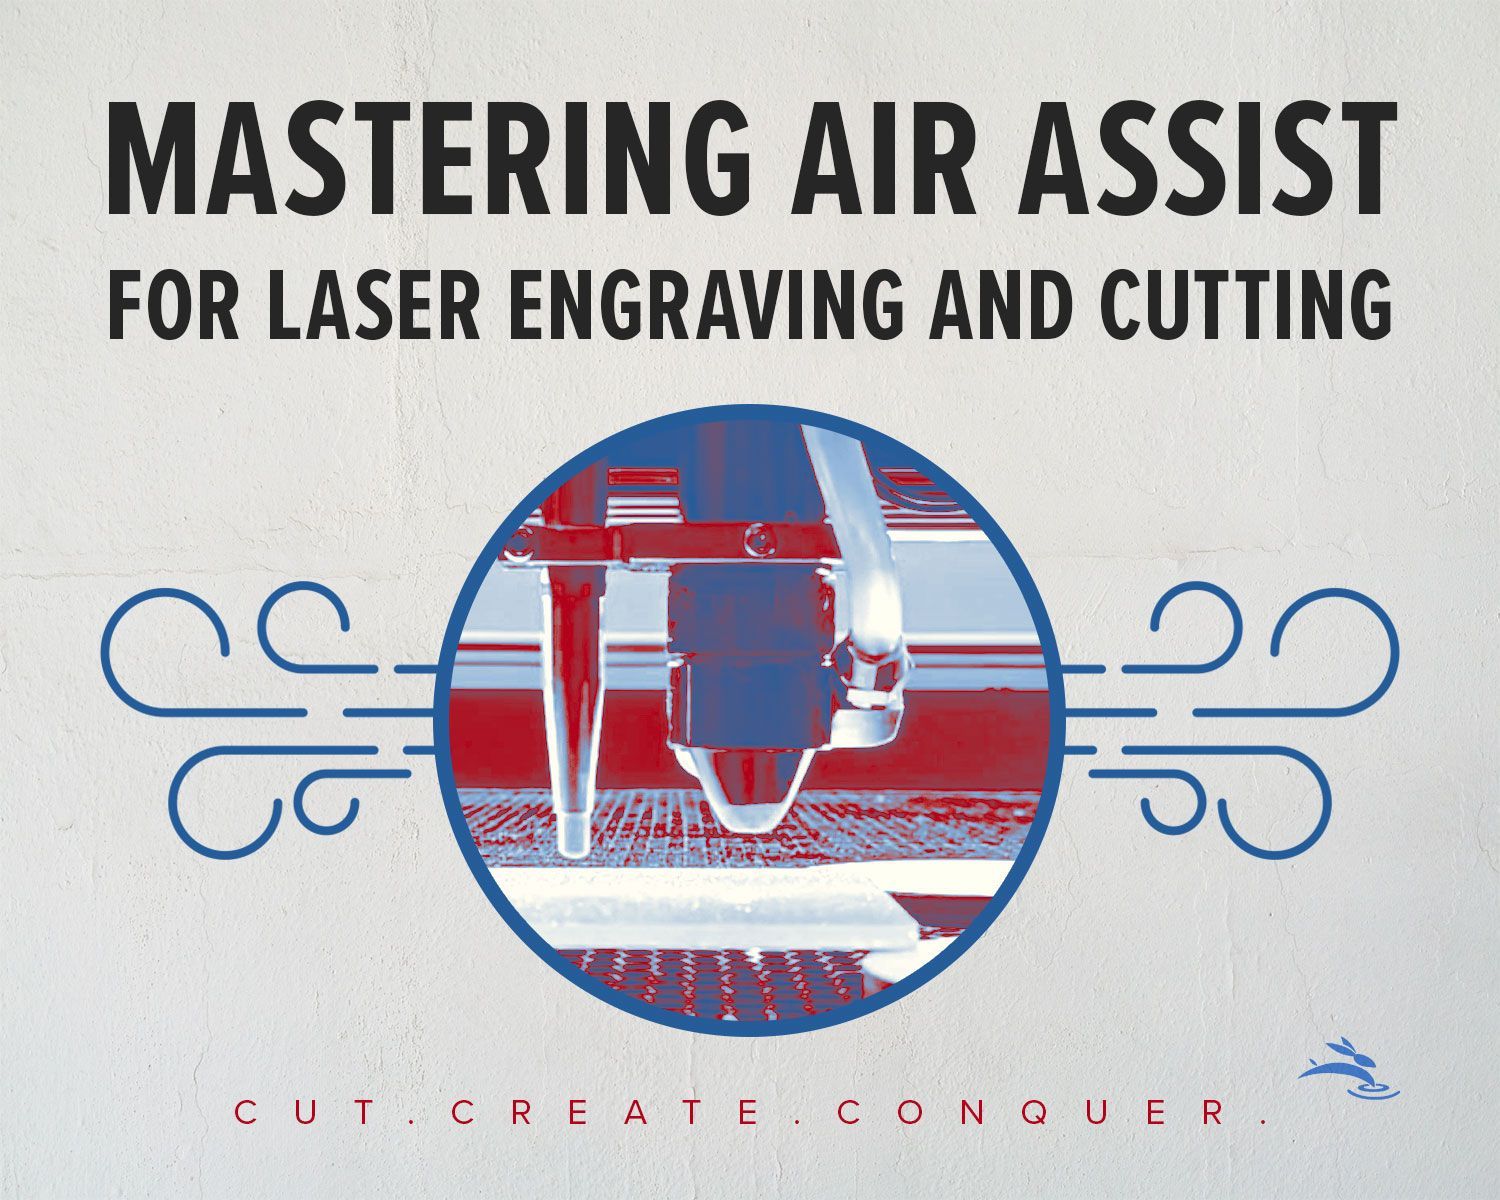
Learn how to master air assist for laser engraving and cutting projects. Discover when to use air assist, tips for optimizing performance, real-world applications, and troubleshooting common issues. Achieve cleaner cuts, sharper engravings, and safer results with expert guidance from Rabbit Laser USA.